Cart
You have no items in your shopping cart
How to set up your foil board to be well balanced for optimum performance
The video above goes in depth on: choosing the right board, where to place your foil and feet in relation to the foil, foot placement and how to attach adjustable foot straps.
Links mentioned in the video:
Blue Planet Show- interview with Kane De Wilde
Tips on foil placement by Kane
Foil boards currently in stock at Blue Planet
Blue Planet Deluxe Neoprene footstrap
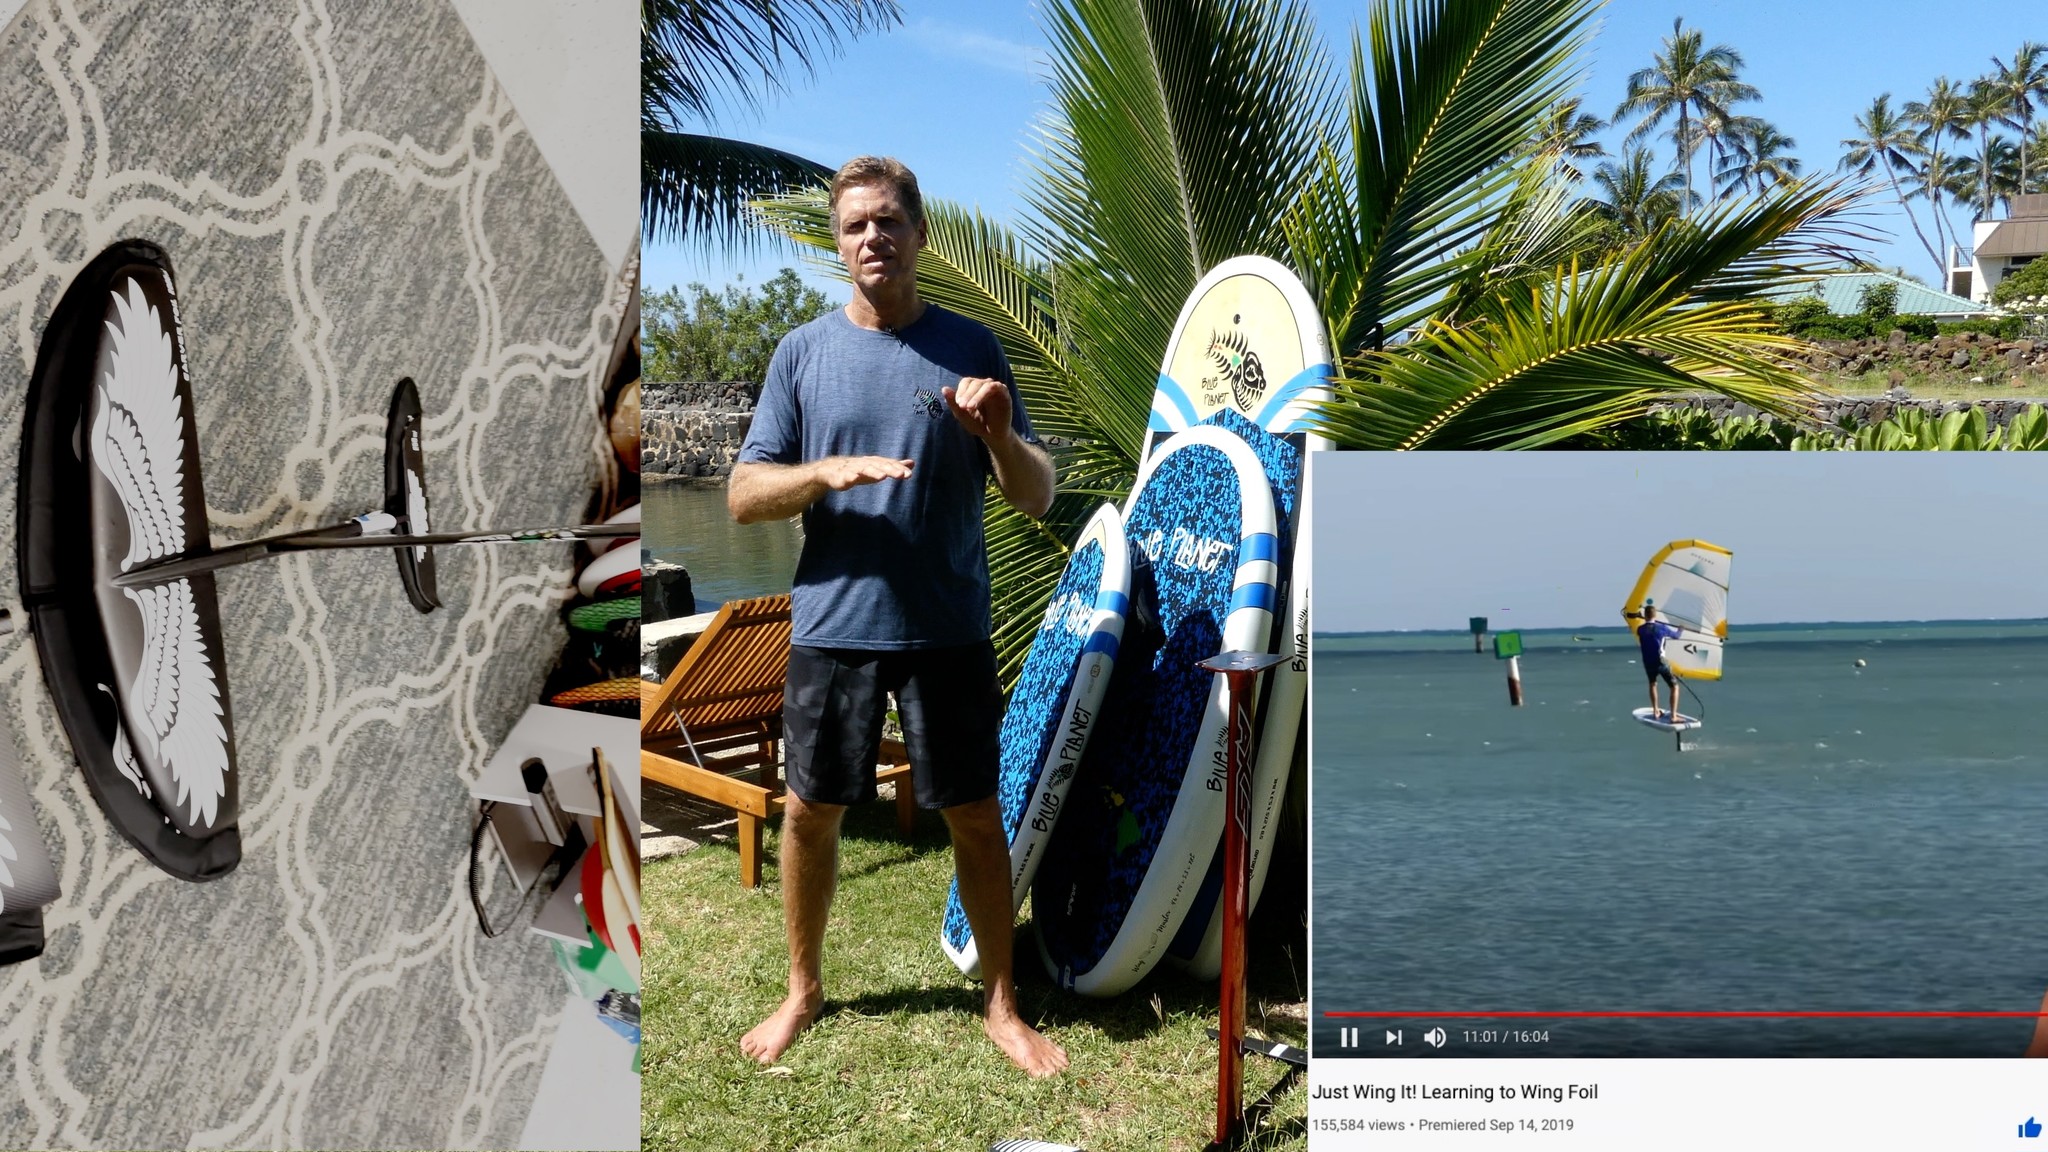
Aloha friends! It's Robert Stehlik with Blue Planet Surf. Today. I'm going to talk about setting up your foil gear. It's a question we get a lot: How do I set up the foil, where to place it, where to put foot straps, how to place your feet on the board, what kind of board to get. I'm also going to talk about what kind of gear to use as a beginner.
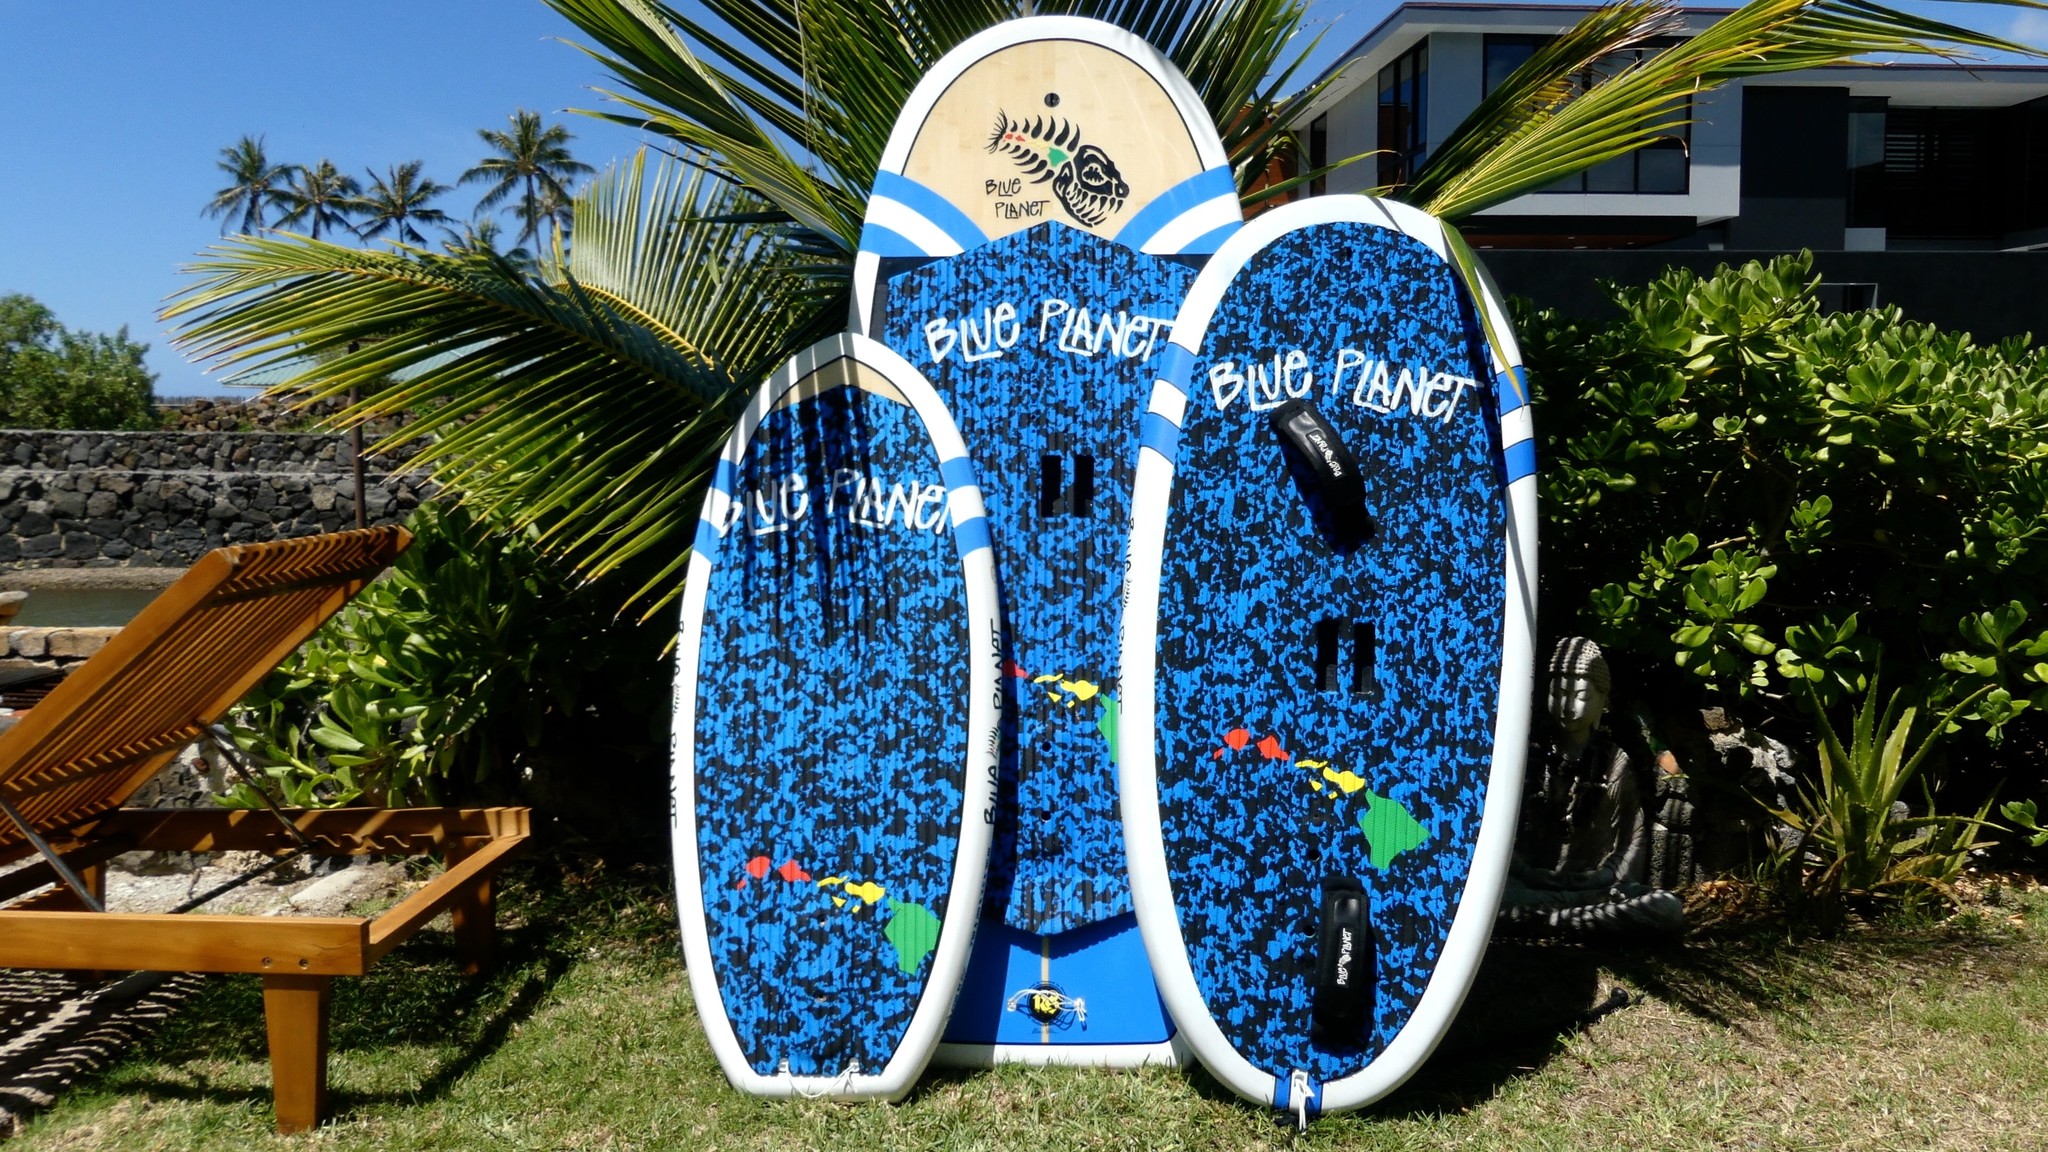
Different board for different uses
And as a more advanced foiler and for different sports- this is my stand-up paddle foil board. Then I have a wing foil board and a prone full board. I'm going to talk about the boards, use the foils used. And then I'm also going to talk about foot placement, how to figure out where to place your feet and how to attach a foot strap to your board.
watch video for foot strap installation instructions
So this video is going to be a little bit longer. We have a lot of information on our website and on YouTube as well. So down below in the description, I'll put a lot of links to other videos and links that will help you further along the way. The last video I posted was an interview with Kane De Wilde and he has a lot of really good insight on foil setups and so on.
And he said, he always likes to try lots of different setups and figure out what works and really feel it out. And that makes a lot of sense to me. The more. You can test things the more, how things work together and how to optimize your setup and having a good setup, especially the foil working well with your skill and how you use it is super important.
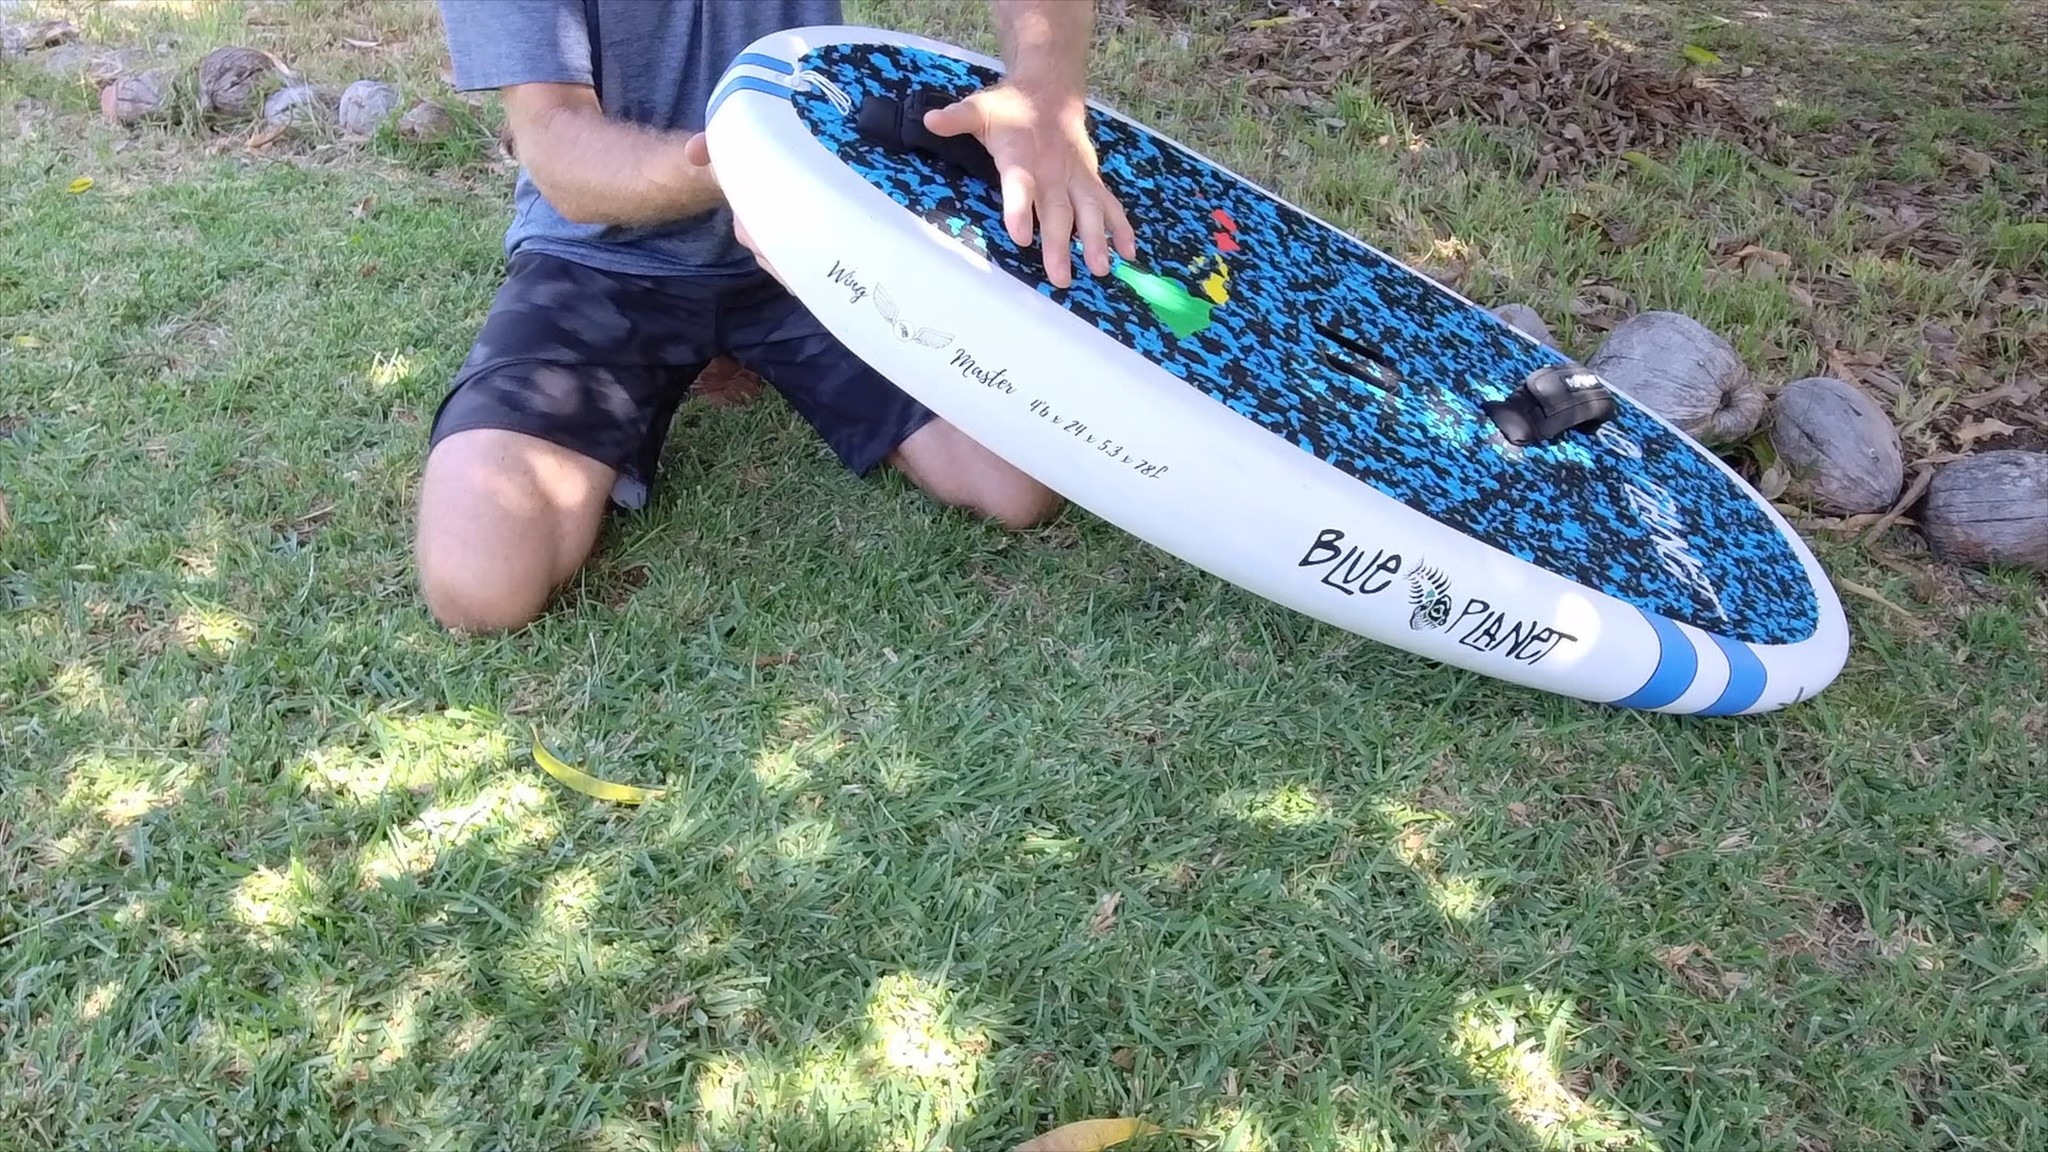
So having a good foil set up and the right board and then a good wing, all those things together will automatically just make you better right away. So these days I mostly into wing foiling. This is the board I use the most here is my my four six by 78 liter wing foil board. What I talk about here today applies to all four sports, including prone surf foiling, wing foiling, and standup foiling.
Different boards for prone surf foiling, wing foiling, and SUP Foiling
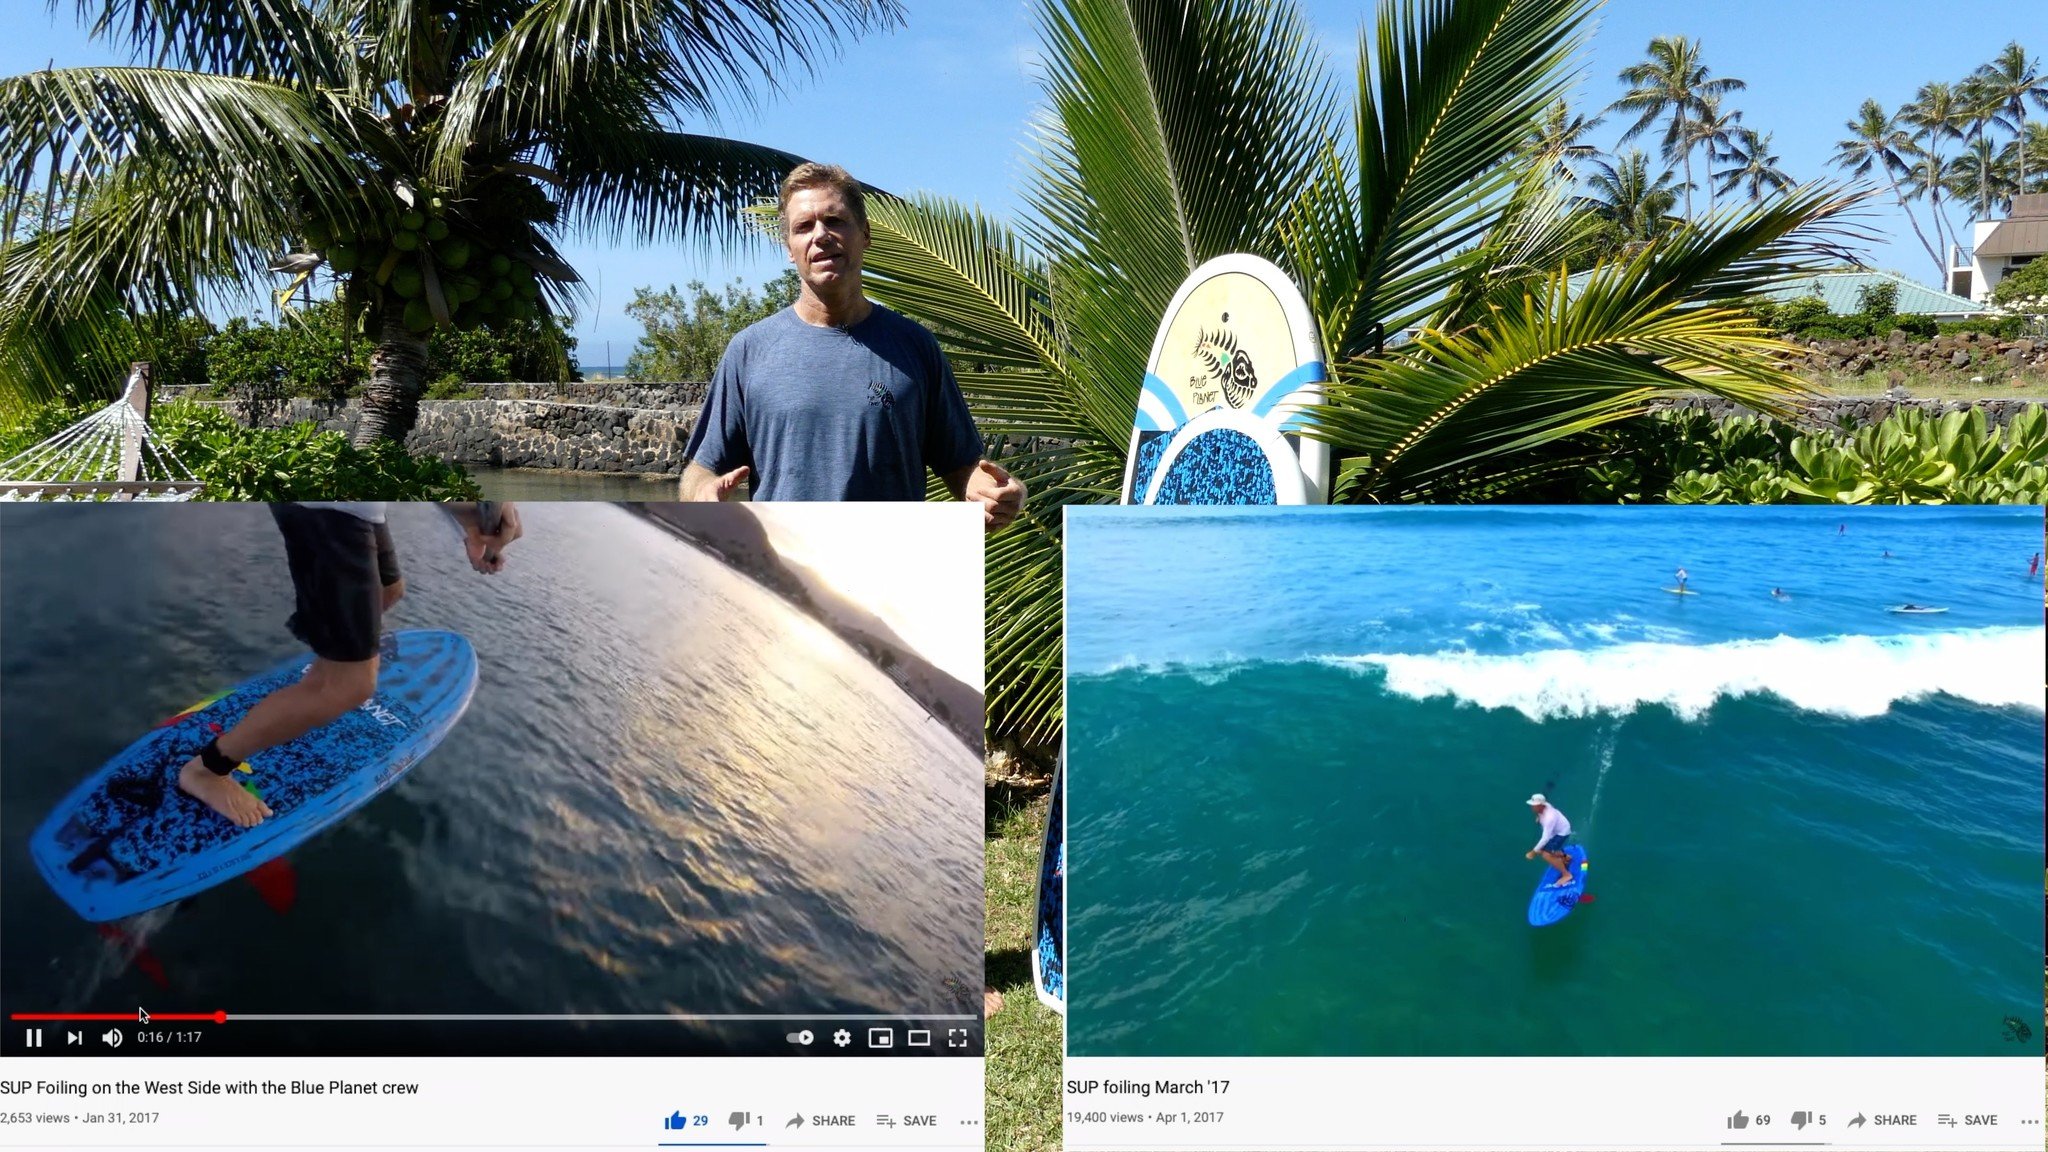
So I started foiling about five years ago. And if you look back through the YouTube history of videos, you'll see, I first started on an 8'0 Stand up for foil board that I just put a Tuttle box into and that worked well to start on and learn on.
 \
\
My first foil board was a 8'0 SUP board with Tuttle box installed.
And then after that I'd built a dedicated foil board. That was a 7'6. And pretty soon I felt like it was too big and the tail was dragging and so on. So I chopped off the tail just to see what happened and made it into a 6'11, and then that worked really well. And I figured out, yeah, having that shorter swing weight and the shorter board really helps when you're foiling up on foil.
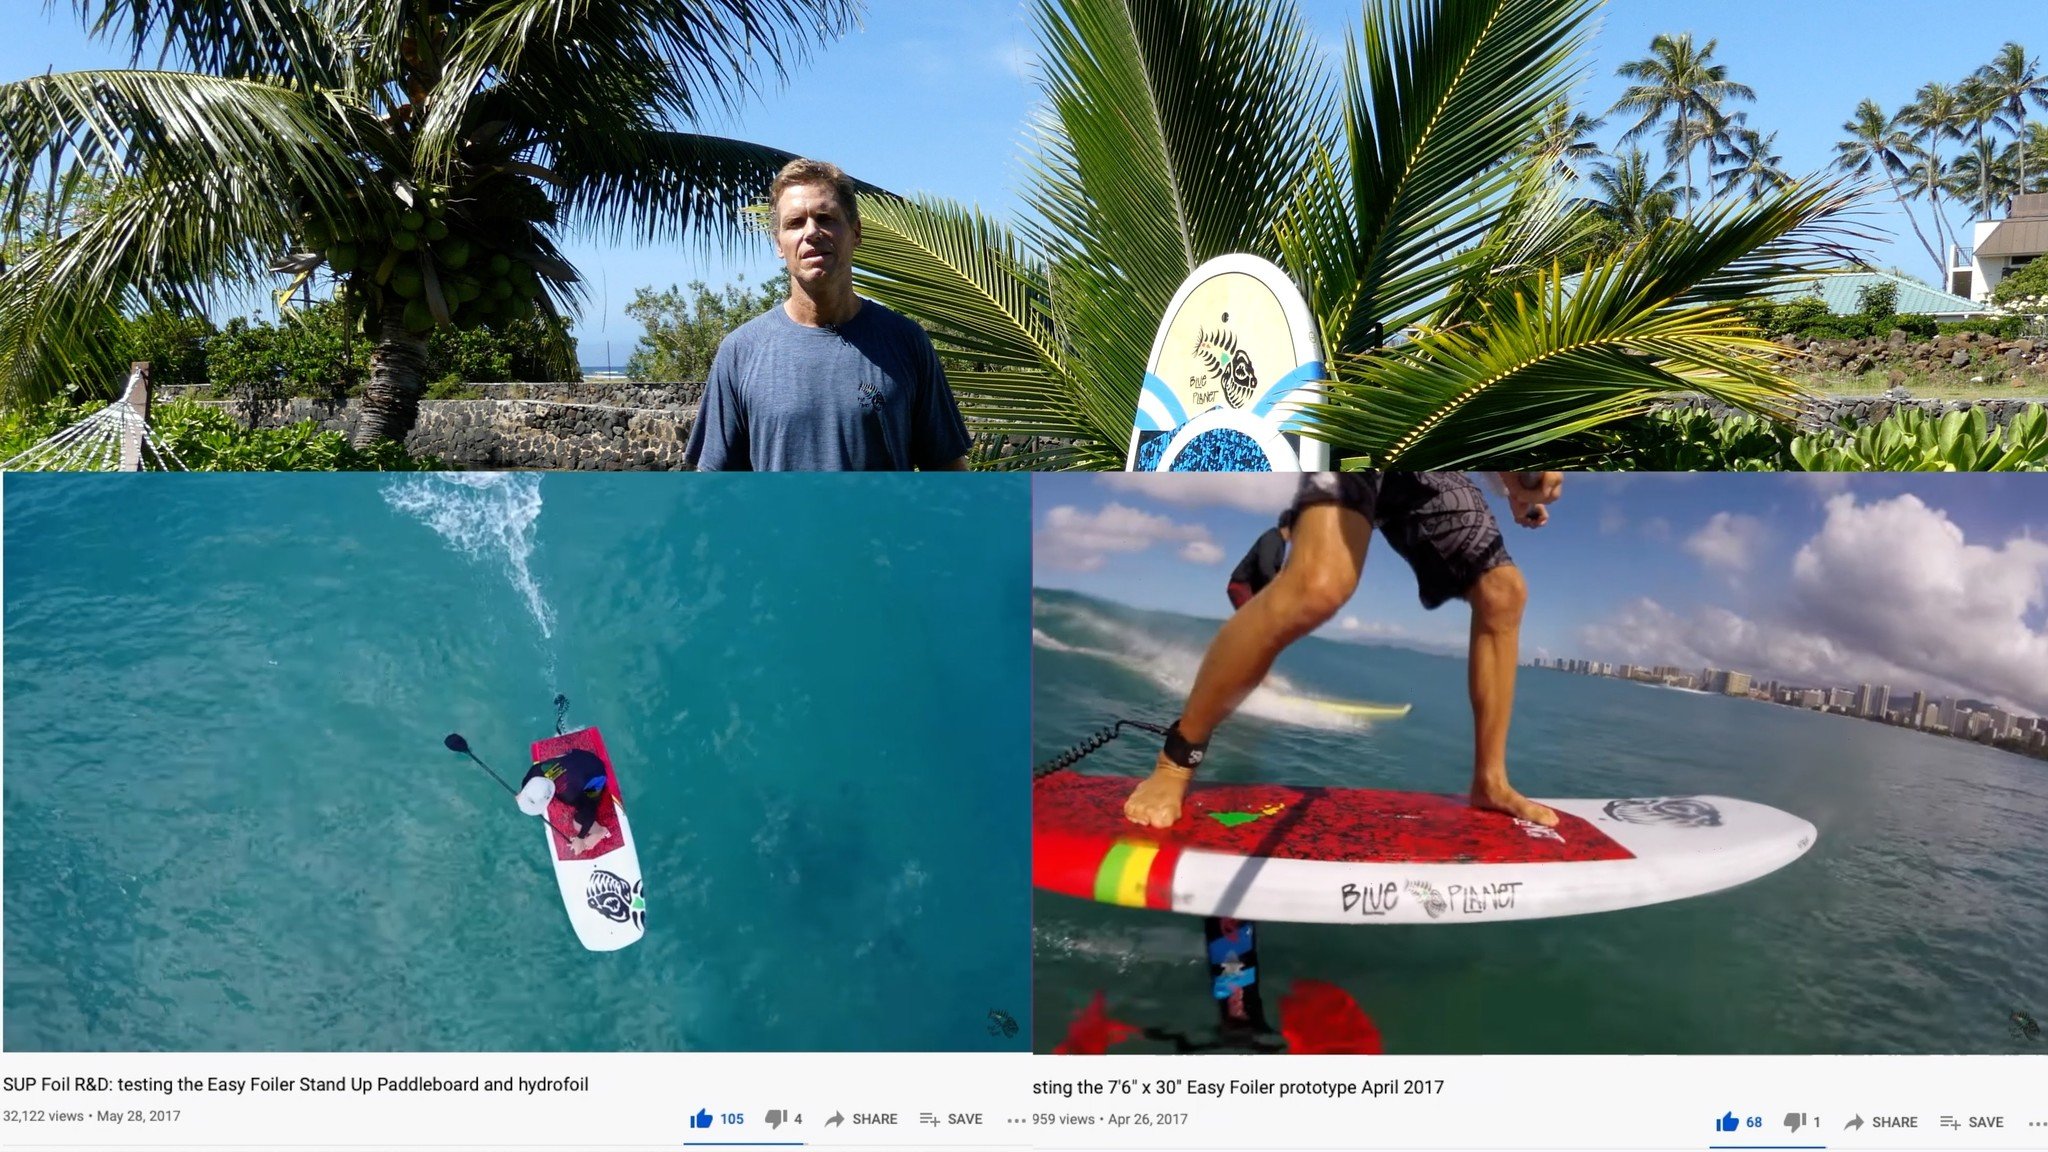
My first dedicated SUP foil board was a 7'6 (on the right). I chopped off the tail and made it into a 6'11 (on the left)
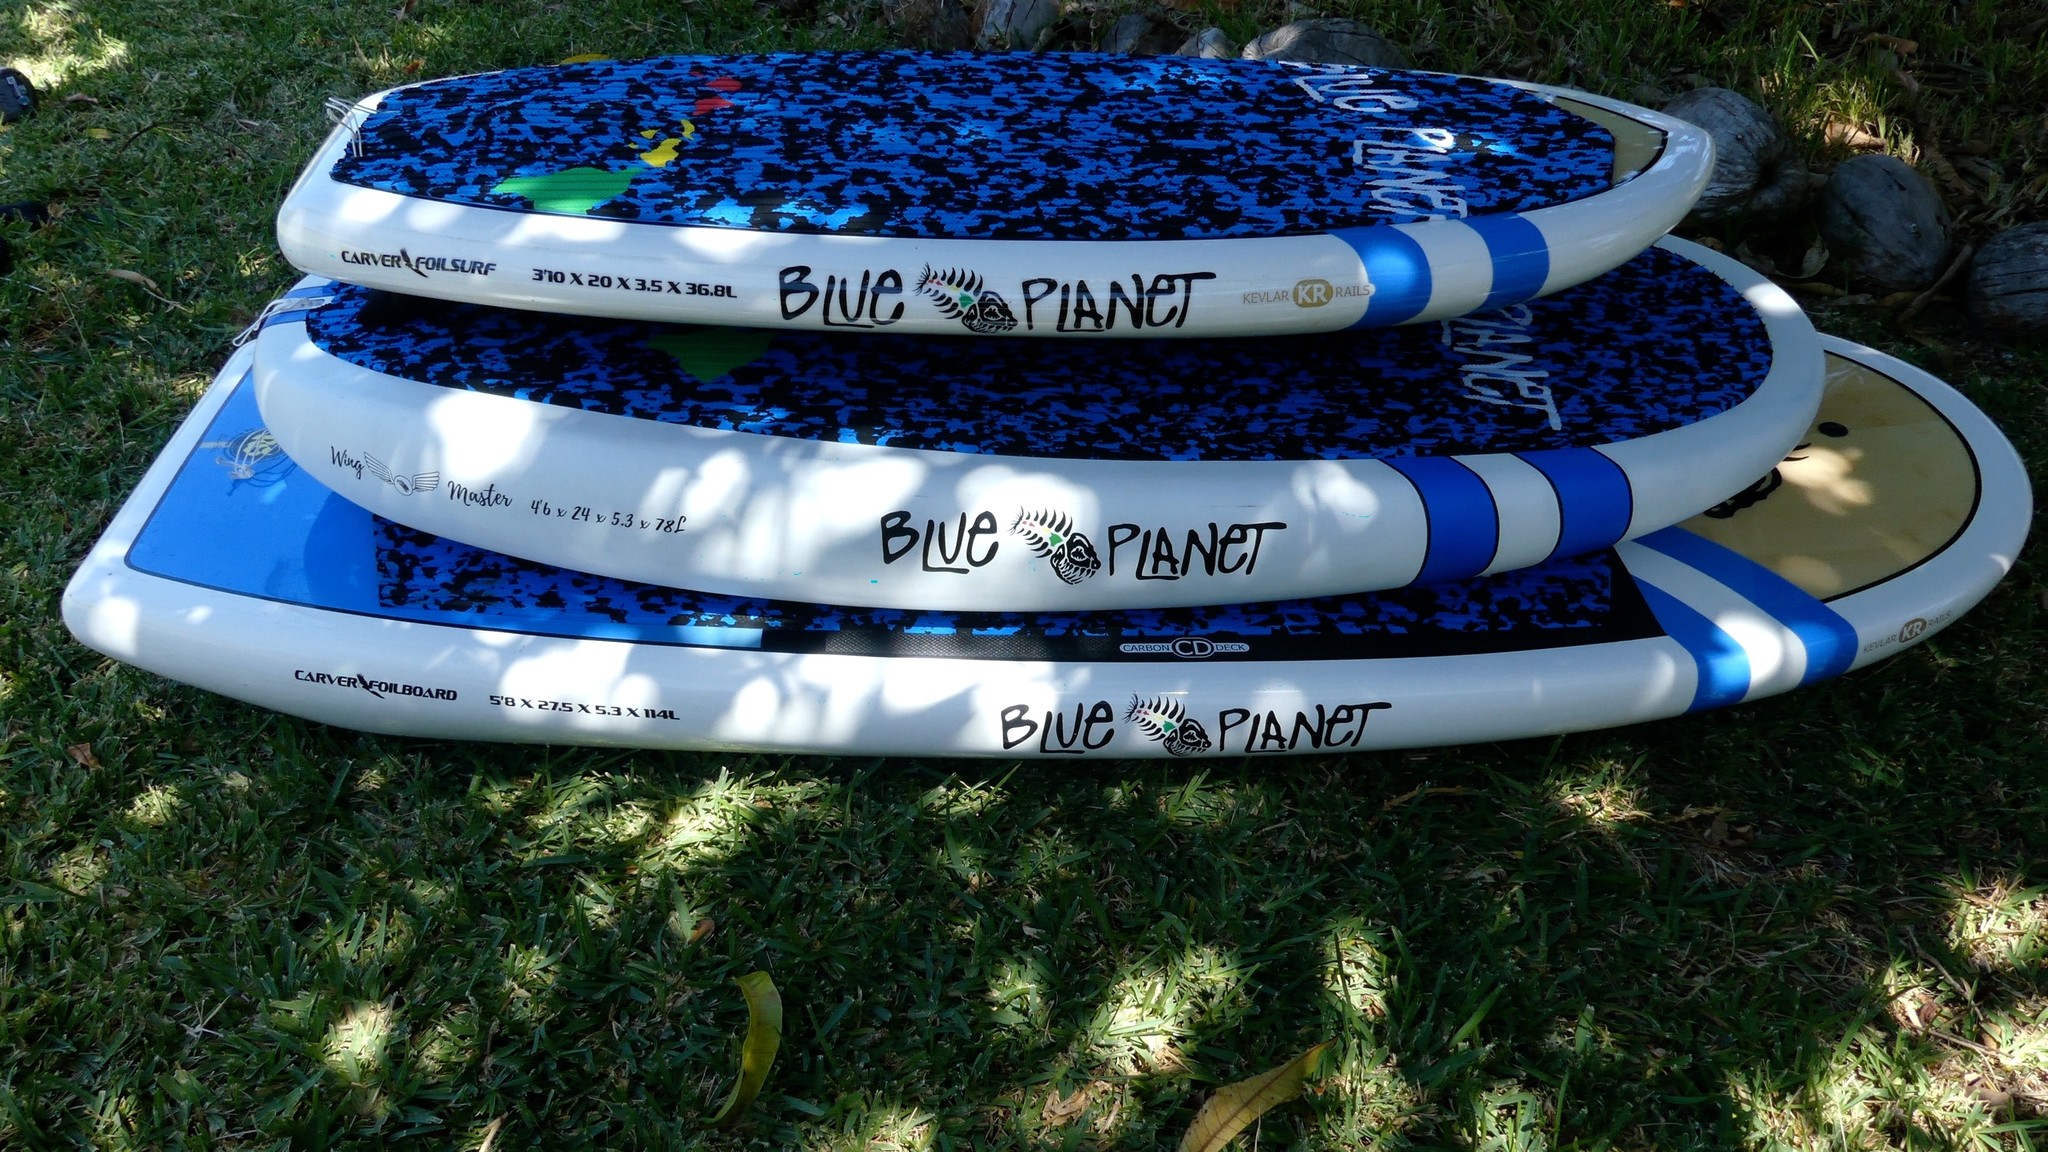
And then I've been progressing progressively, been testing smaller and smaller boards. And now what I use for wing foiling is a four six, which is pretty tiny. And for prone surf foiling I use a similar length board. This one here is a 3'10. I use this mostly for practicing my dock Starts, which I'm not very good at yet, but working on that, trying to dock start and pump.

This is my 3'11 prone surf foil board that I use to practice dock starts
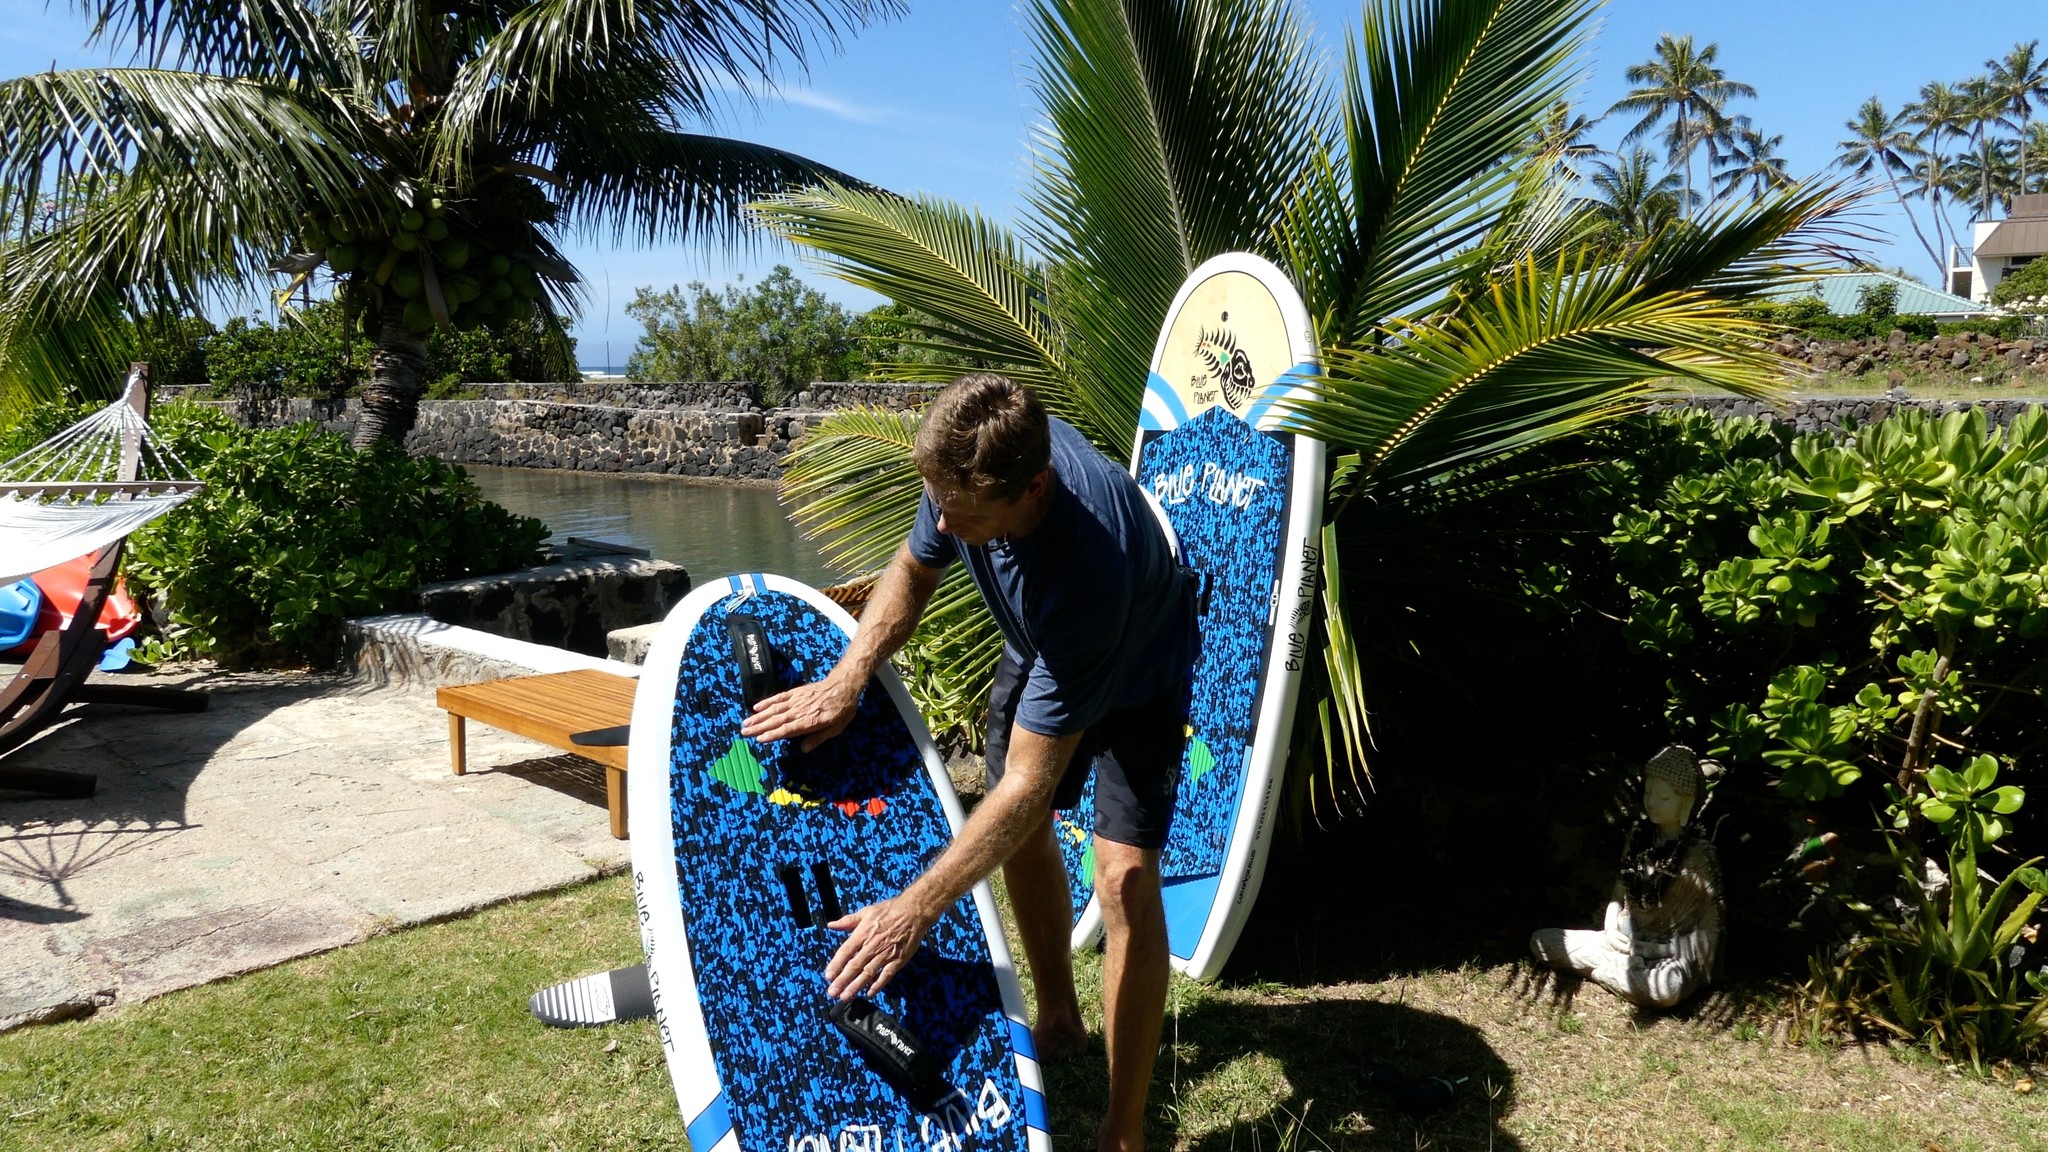
And then for standup foiling, I use this board here. It's a five eight by 114 liter board for standing up falling. I just need more stability.
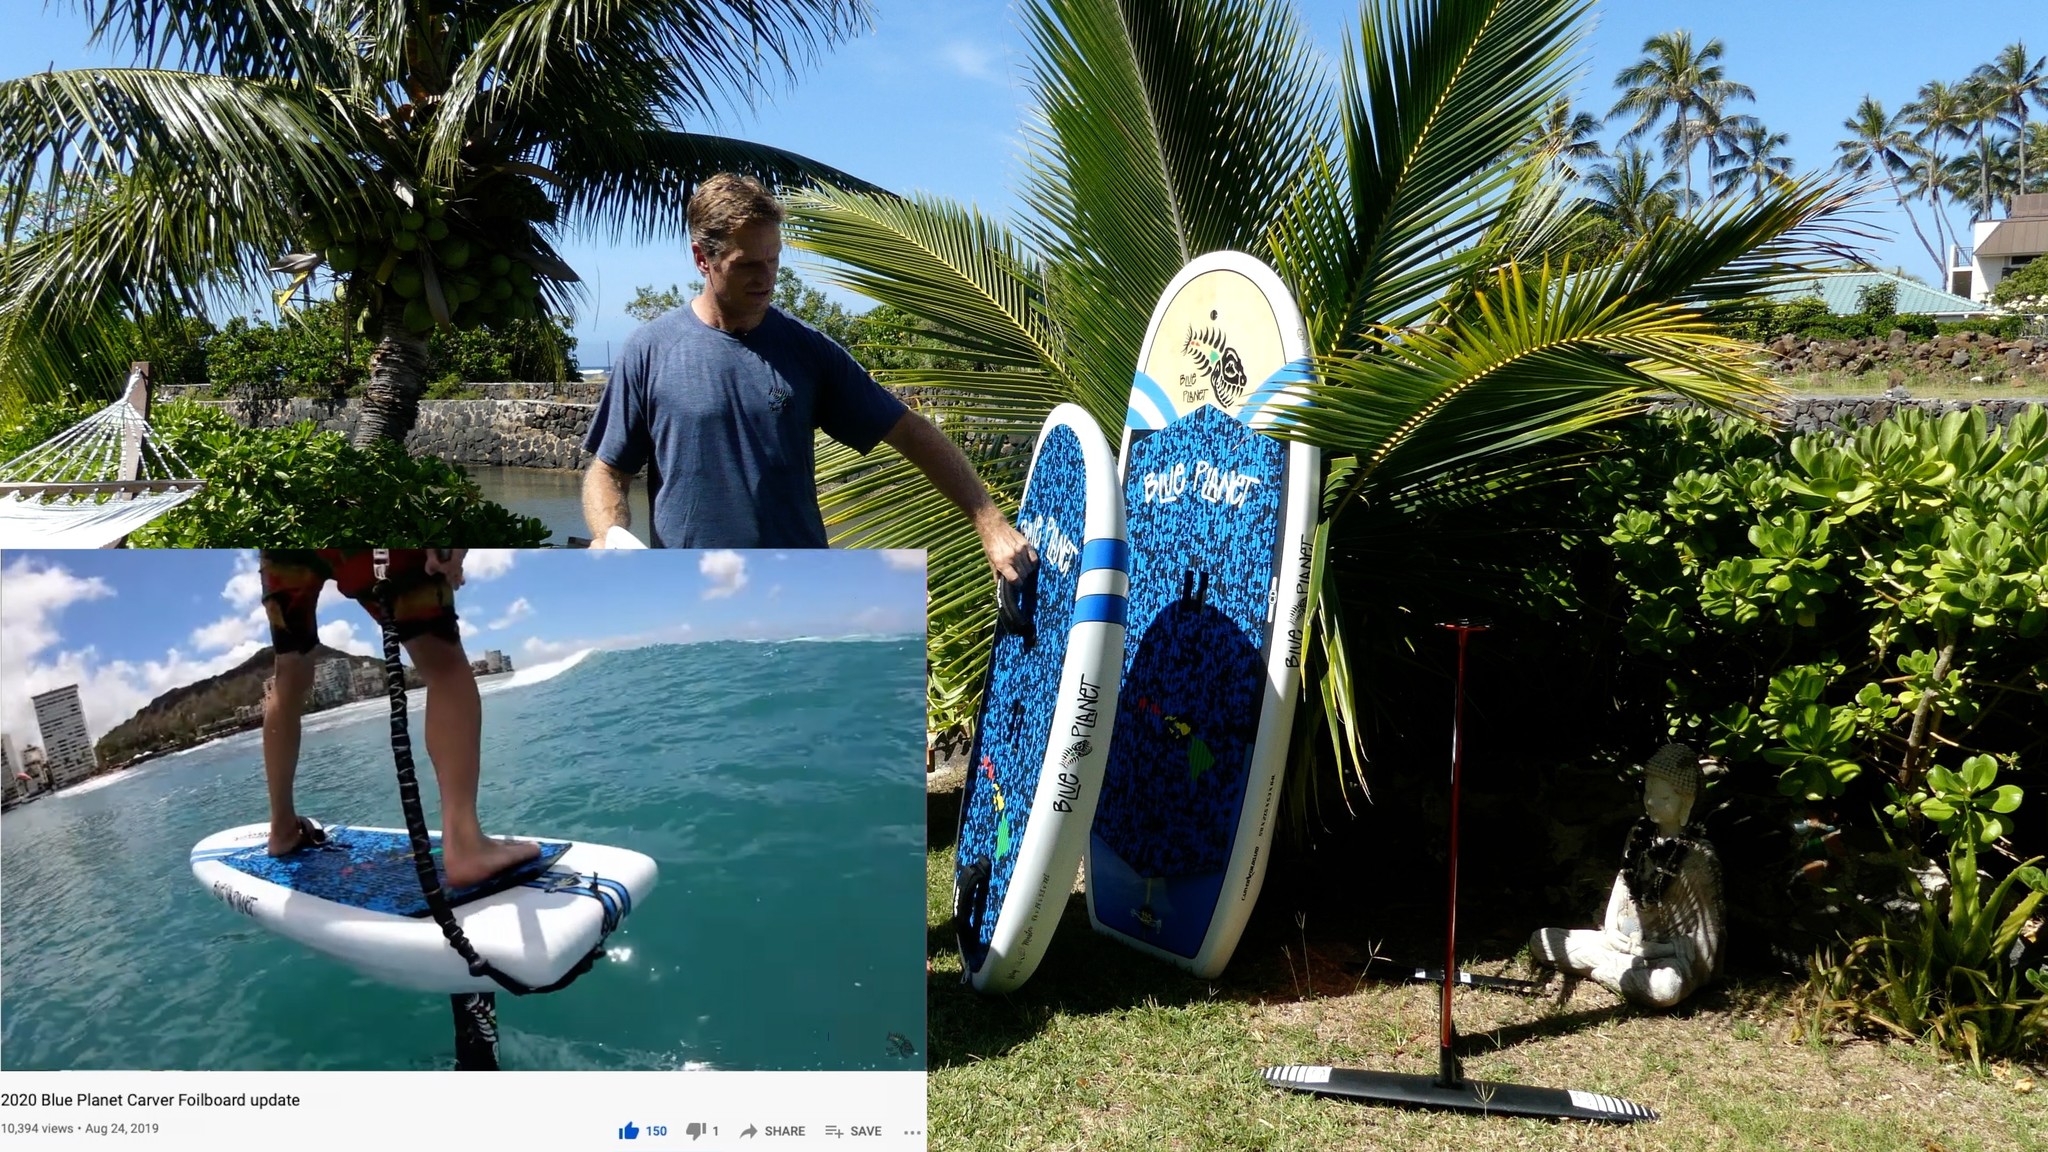
For SUP foiling I use a 5'8 Carver Foilboard
The wing master board is great for wing flooding, but it's not stable enough for me to stand up paddle on maybe a lighter weight. A paddler with really good balance might be able to stand up paddle on this. But generally speaking, this board is going to be too small for most people to stand up paddle for long. So something like this, the 5'8 Really nice. Stand-up foil board also works well as a wing foil board because wing filing, you have the wit lift of the wing. So you don't need quite as much stability as you do for standup and bouncing while you're standing up for getting started and wing foiling and standup foiling.
I recommend getting a bigger, stable board. So in our range, we have the 6'11 and the 7'6 Easy Foiler models. Those are really good boards for learning how to Stand up paddle foil and wing foil. And then as you get better and you're comfortable standing up and you can maybe switch your feet around and do all the basics on a bigger board, then you're ready to go some to something smaller, maybe something like this five, eight Carver foil board, or for a little bit more advanced for, and these Wingmaster boards are awesome. But this is not going to be your first Wingfoil board, it's going take a bigger board to first learn the basics on, and then you can work your way down to a small board like this. For me, it was many boards in between. And, obviously I own as a brand and I designed these boards. So I do a lot of R & D and made a lot of boards slowly working my way down.
Probably just like a few inches in a few liters at a time. So I didn't start on a big board and ended up on this right away. There's a lot of steps in between. And you don't have to take that many steps, but I would say between a beginner board and the very advanced board, there should be at least two or three boards.
To get to that point where you can write a really small board. So don't think you can just start wing filing on a little tiny prone board. This is it's possible. I've seen people do it before that are super talented athletes and already very good filers. I've seen people learn how to wing full on prone.
The boards, but if you're an average Joe don't even attempt it. It's going to be way too hard to try to learn on it, tiny board. And for me it wing for the thing I liked to have a little bit more volume. So I'm, my weight is 195 pounds. I'm 6'2" and 195 pounds which is roughly 90 kilograms.
So that translates into 90 liters of volume to float me. So the first 90 liters of volume will float my body weight. And then of course you also have to add in the weight of the foil and the board itself. And and basically if you want it to float you, you need to have equal amount of flotation to your body weight. So the volume really depends on your body weight. And then for a beginner, I recommend getting a board that has enough volume to float your body weight, plus maybe 20%. So for me maybe as a beginner, I would use a boy that's at least about 120 liters, maybe more that will be good to float me.
For weighing foiling for standup foiling, you might get something even a little bit bigger. Maybe for me, I would choose like 140, 150 liters and enough width and length and stability to be able to send a paddle on and learn on. And then as you get better with the balancing and catching waves and getting up on the foil, then you can move smaller and the foil does add stability to the board.
Having a foil board is going to be more stable than a regular standup paddleboard, but it's a certain type of balance that you have to get used to it. Doesn't. Just automatically make balancing easy. It's just a little bit delay, so it slows down the movement of the board a little bit in that foil underneath.
It's like having a keel under your board. So next let's talk about the foils themselves. I've been doing this a long time. I use quite a small foil now for wing foiling, especially like for waves and stuff like that, trying to go faster. This is an access high aspect aspect for us.
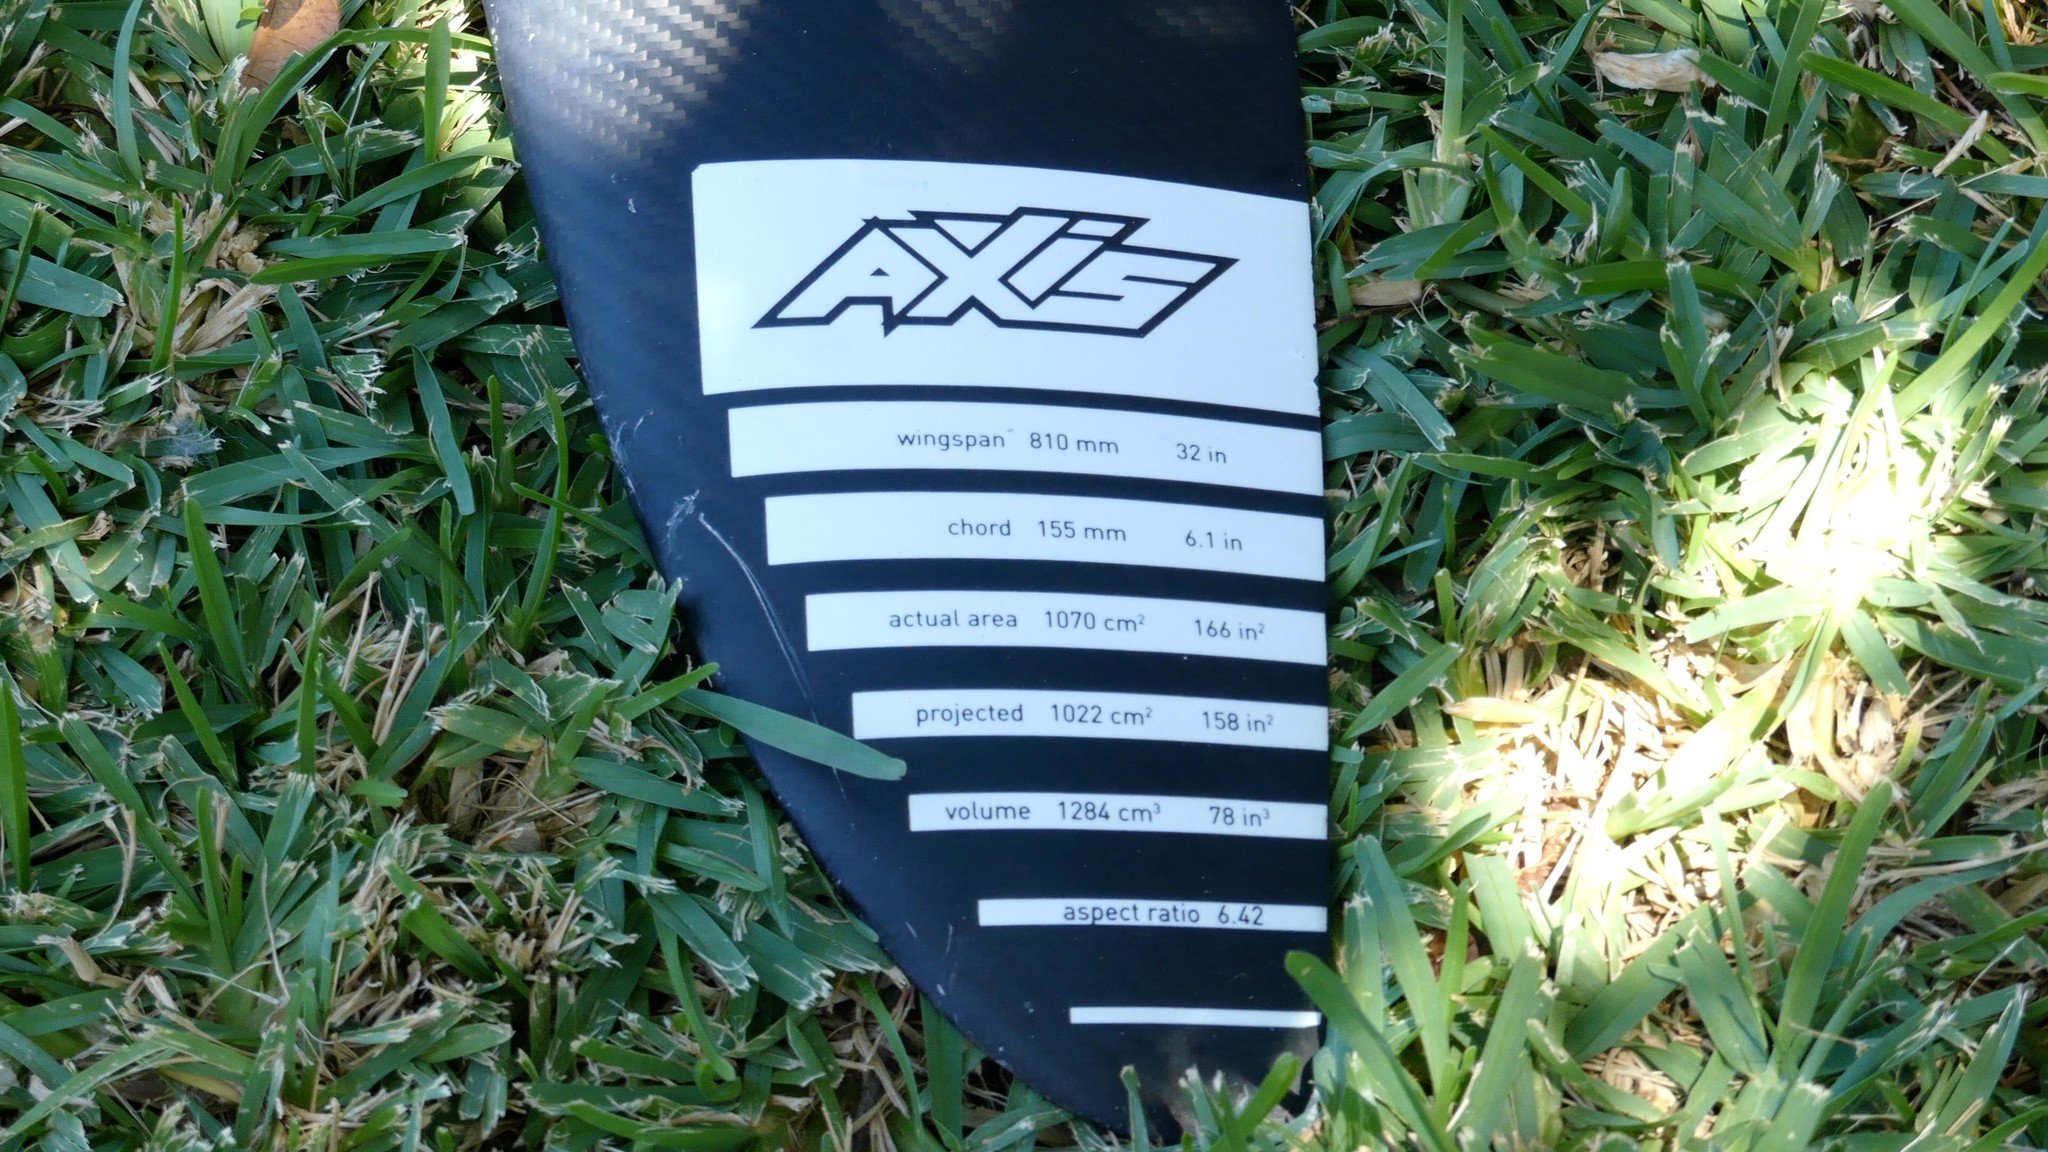
The Axis 810 is a great front foil wing for advanced wing foilers
The Axis 810, a wing span or 810 millimeters or 32 inches. And the projected surface area is 1022 square centimeters, that's about 158 square inches. So this is quite a small front wing, but because it's pretty high aspect and it's actually quite, has quite a bit of lift and a lot of glide.
So I really liked this, a front wing. Also I have a 760, which is a little bit more surfy, which is also a really nice but for starting out on, When I started, I used a really big foil, the 2000 square centimeter foil. So when you're starting something like the Carver foil, We have the group plan at Carver for is a great forum for learning.
The Carver Foil XL 2000 is a great foil to learn on- stable and lots of lift at low speeds
It's 2000 square centimeters. It's stable comes up at low speeds and flies out a little bit lower speed, but it just keeps gliding. If you're doing a transition, if you muck it up a little bit, you've got way more time to glide out of the turn and stay up on the foil. And it just lifts up easier and lower speeds.
So it's this much easier to use a bigger foil when you're starting out. And even as you progress, depending on the conditions you're winging in having a big foil is just makes everything a little bit easier. And and it allows you to do more tricks and things like that. So these smaller foils are not for everybody, but as you get better, having a smaller foil.
And a thinner profile, just allows you to go faster, do tighter turns, be more maneuverable and going faster really helps in the waves because a lot of times when you catching away from the outside, it's still moving really fast and you have to be able to keep up with that fast moving swell. And then having a faster, smaller wing, will this help you be able to keep up with those waves versus if you're just riding wind swell or just on a flat water, a Lake or something like that?
Having a bigger wing is nice because you can just fly a little bit more slowly. It's not a big deal. And then it just gives you more time. To stay on foil, easier to get up on foil and lighter winds also. So there's a lot of advantages of using a bigger foil. So when you're starting out, definitely get a bigger size foil something, 2000 square centimeters.
Or we also have 1,800 square centimeters, large size, something like that. And then in terms of mass length, I like to use a 90 centimeter mast. I've tried longer mass and that's having a really long mass is nice for downwinders it's like that, but it does make the whole thing a little bit more tippy on the shorter mass.
You have to follow the waves up and down as the wave goes up, you have to dip your nose up and down and longer. Mass allows you just to fly straight over to the smaller chops. That's nice, but I have a really detailed video and I'll put the link down below to that on choosing the best foil for your needs.
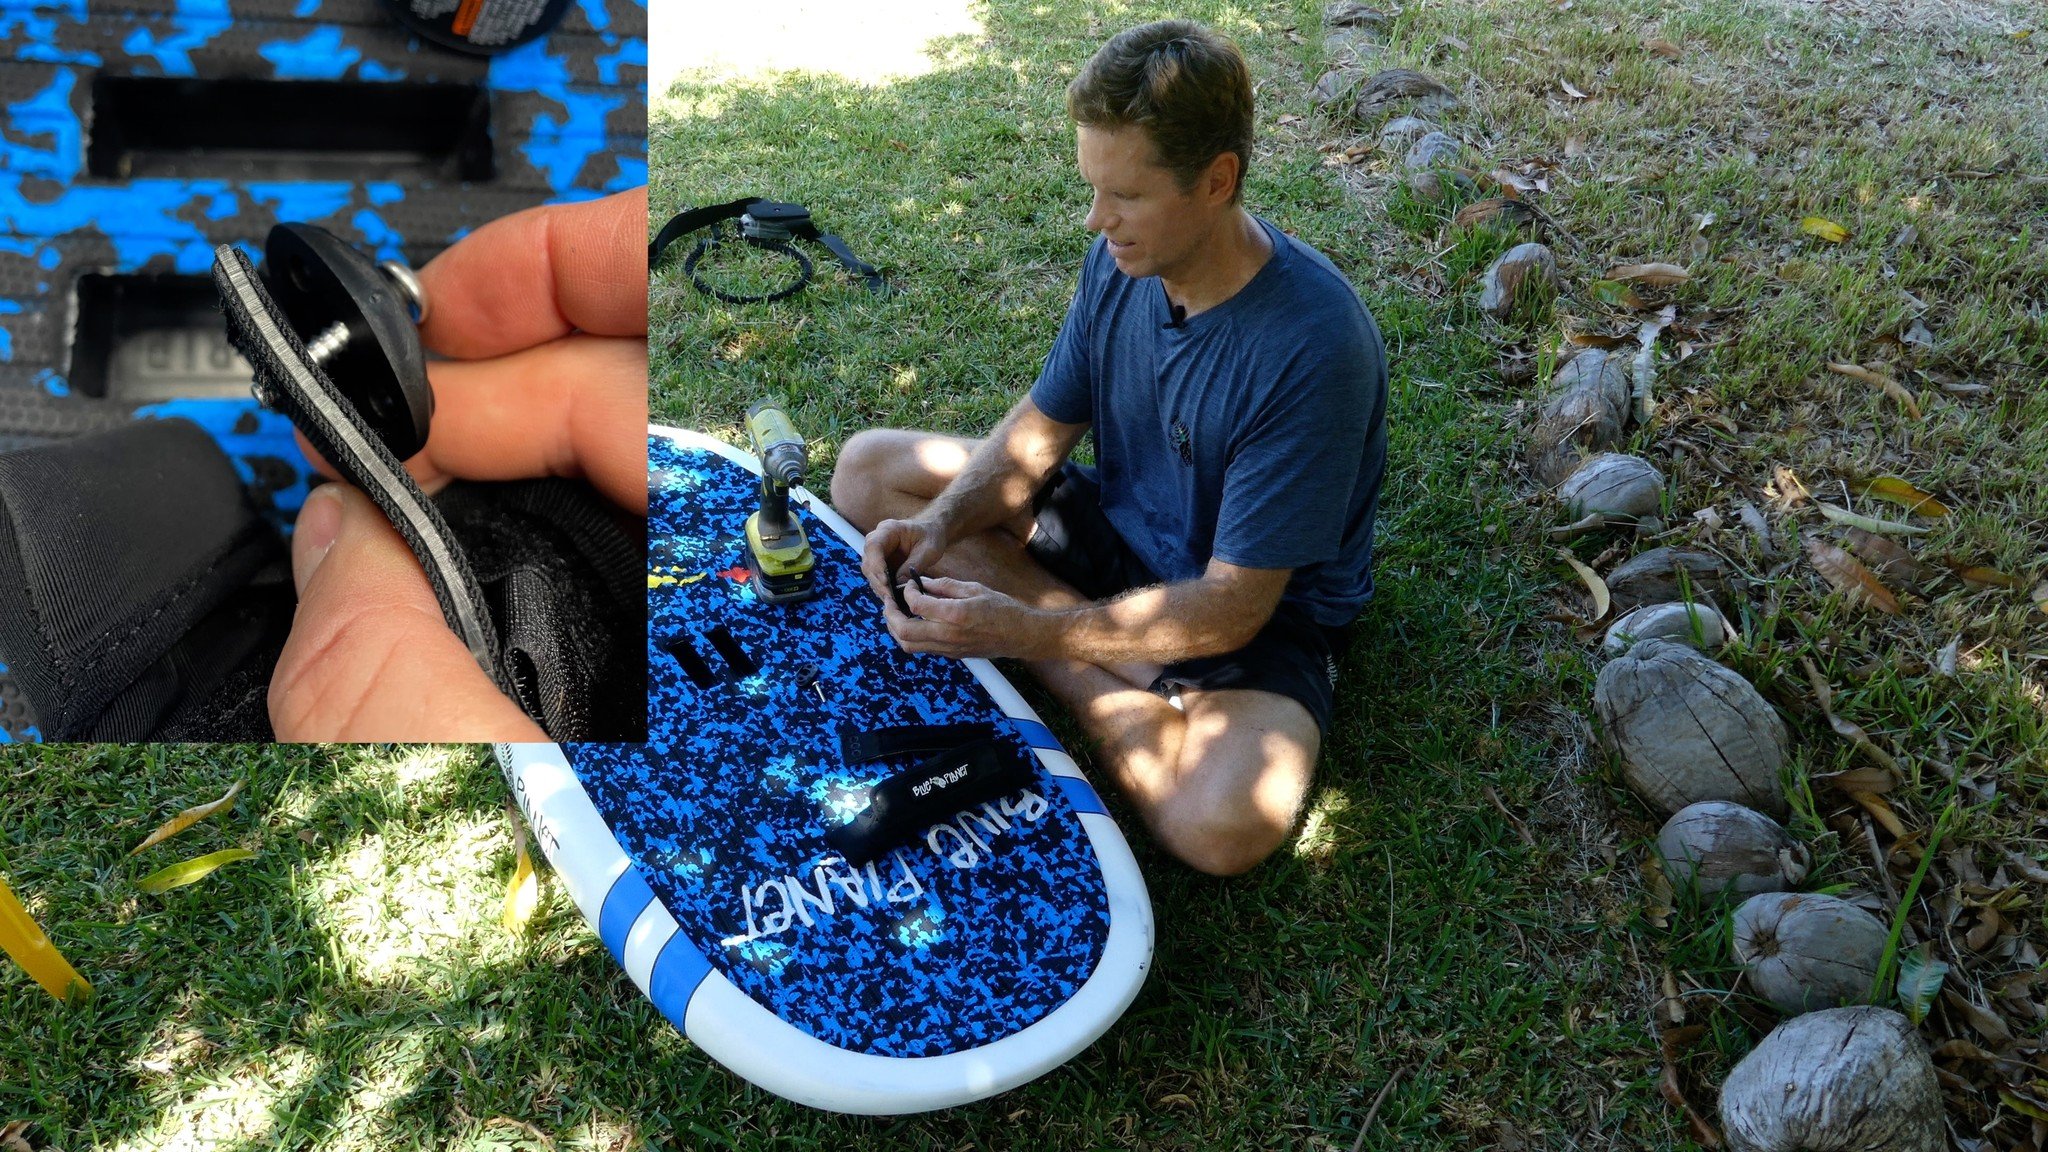
So watch that as well. That's some really good information if you're not sure what kind of flow you're going to need. And so on. So next, I'm going to talk about putting the foot on the board and where to put it. So my car is pretty small, so I have to take the foil off the board and put it back on. Every time I use it.
And for that reason, I bought this, the impact driver, which is a really nice tool to have really makes it easy to put the foil on and off. And for me, yeah, I usually just keep the bolts in the board and I tightened them down, so they can't slide. So I just loosen up these four bolts. You don't want to leave them in the board loose because it can slide out.
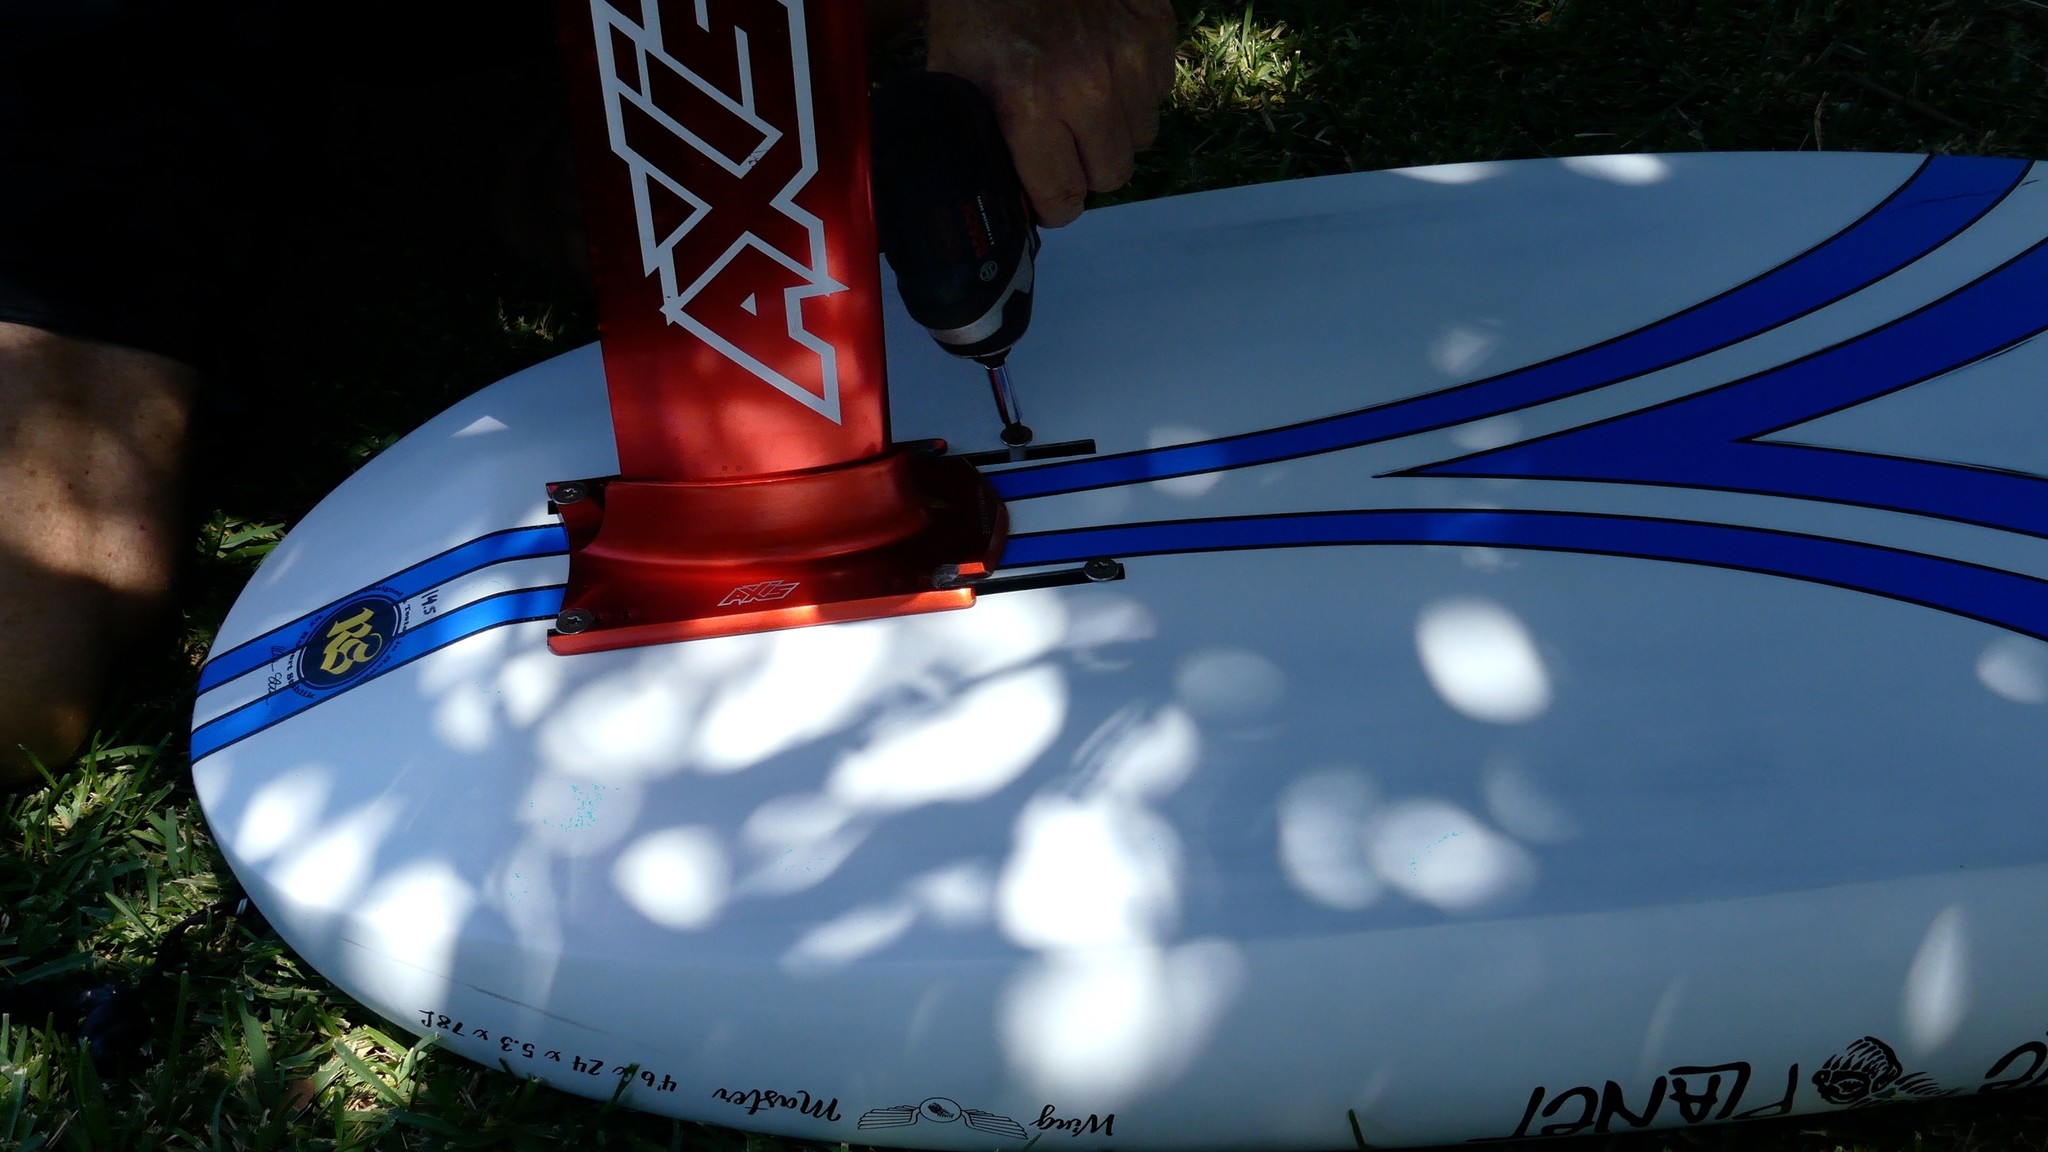
A battery powered Impact driver is a great tool to have
And then if they drop out while you're carrying the board and the grass or something like that, these are easy to lose. So I always make sure these are tight enough, so they can't slide out by themselves. And I said, the mass plate that has, that allows you to slide the bolt onto it. And then I like to just tighten them down. Okay. Little bit, get them all in place.
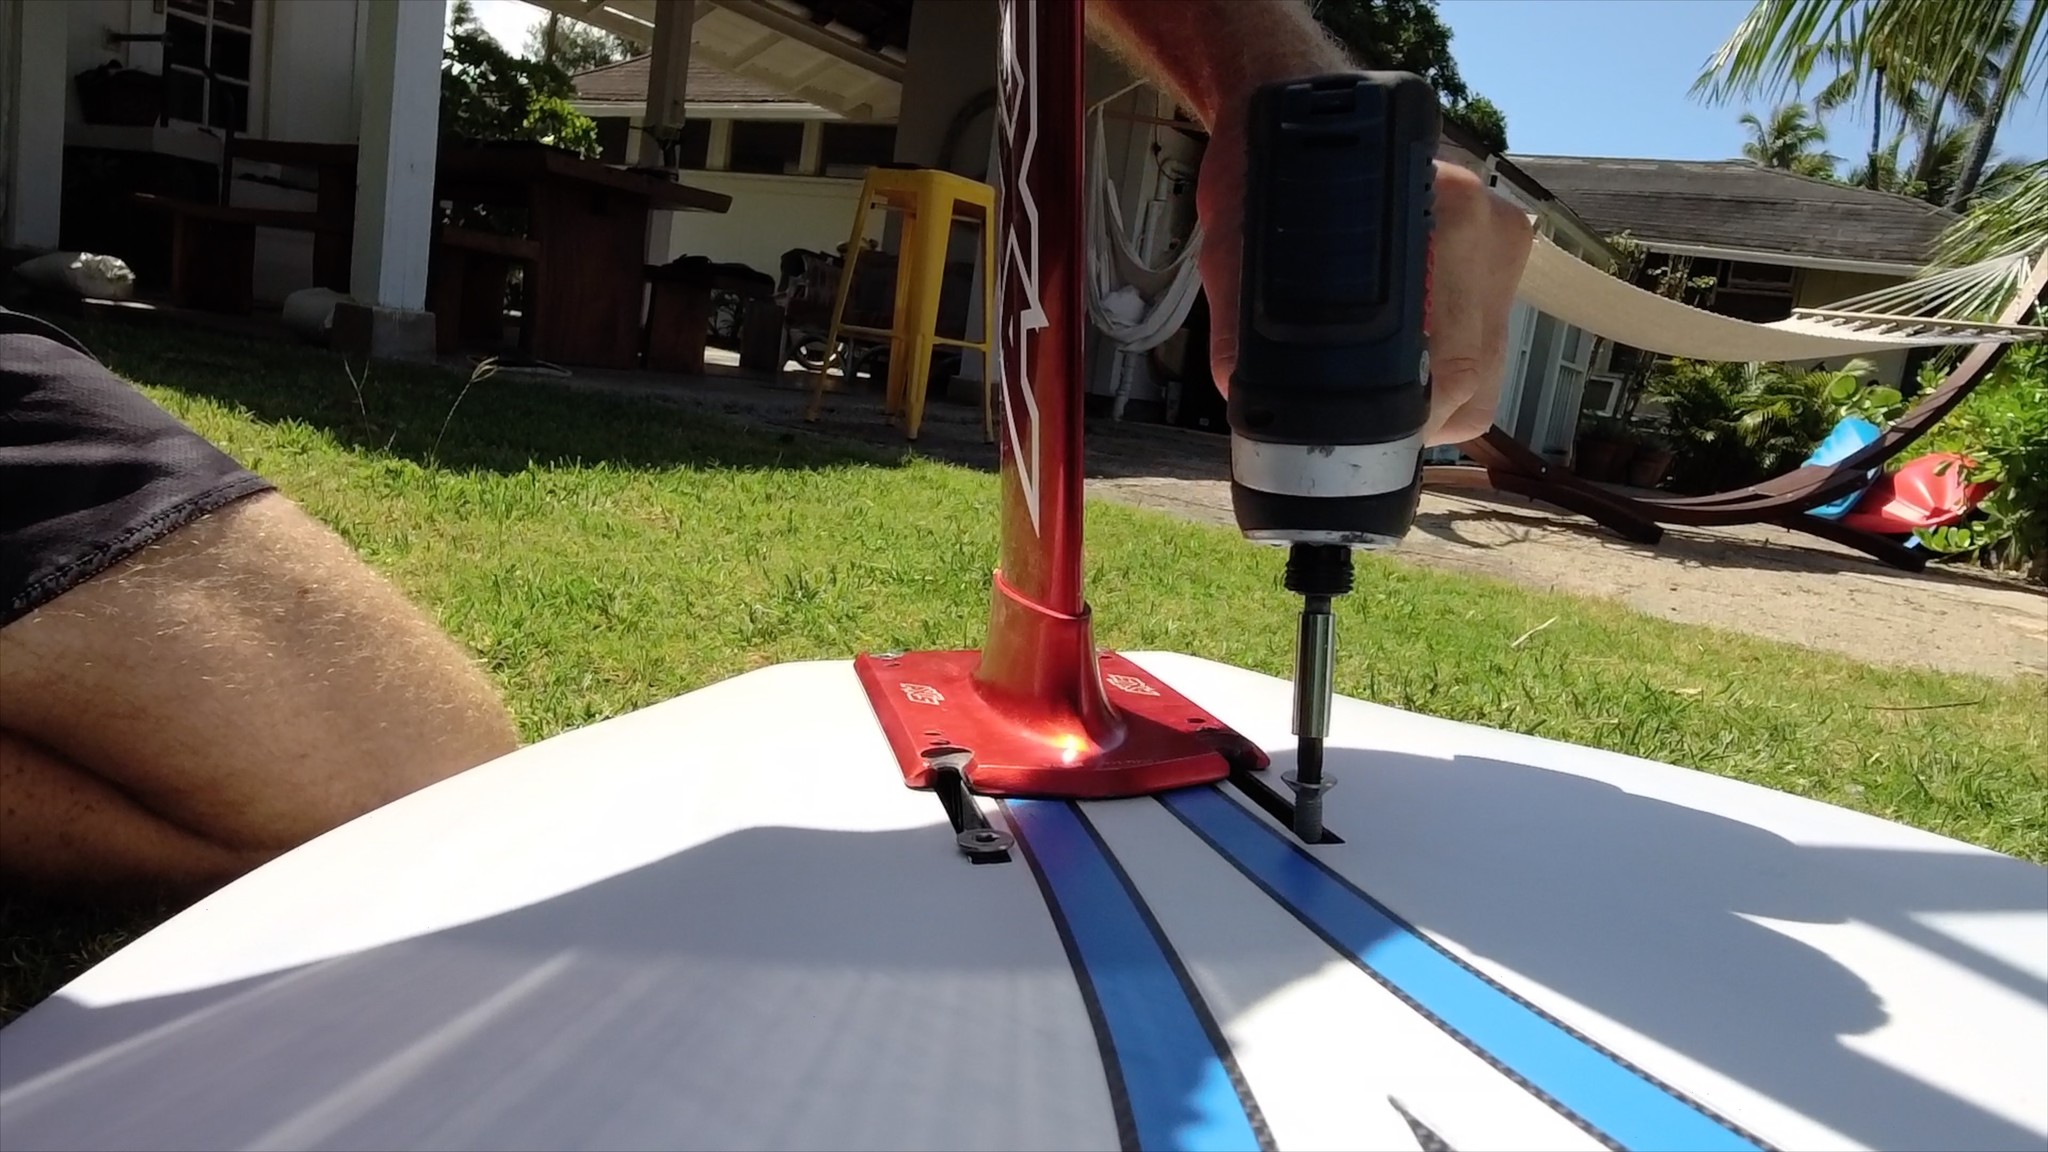
attaching foil to board
Once they're all situated, then you can crank them down. You definitely want to make sure they're tight on there because you don't want these bolts to loosen up while you're riding.
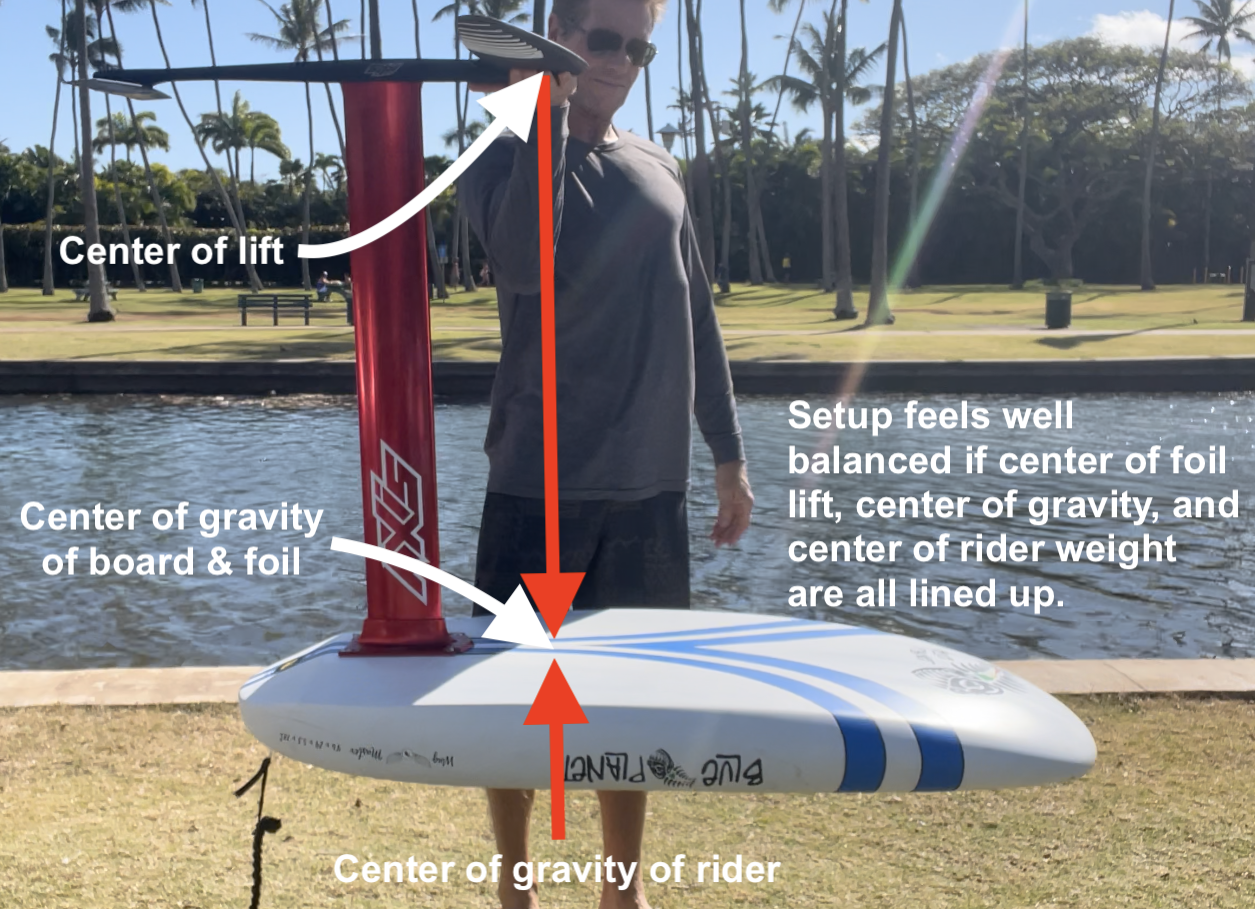
So now I got the full on the board. And the next question is how do you place the foil on the board? And that really, it really depends on the foil itself and the board, the size of the board Kindle while came up with a good methods. Have a good starting point of where to place your foil. And that's just, if you lift up the whole setup from the thickest point of the foil, the think is pointing to the first about a third back on the profile.
So that's where the center of lift is so that the front wing creates a lift center of lift is right here at the thickest part. So if you lift up your setup from that point, your board should be pretty much level. So if your board is level. That means the center of gravity of your whole system is straight underneath the center of lift of the foil.
So then let's say this, you project that to here then on the other side of the board, if you look at that same point on the deck, This should be pretty much in between your feet. So if your feet are too far forward, you're going to have to put more weight on the back of, on your back foot. If your feet are too far back, then you have to lean more on your front foot.
So ideally you want to have your feet equally balanced so that the center of lift is right between your feet. And then if it's also the center of gravity of the whole system, it'll just feel way more balanced. The weight of the system and the center volume all balance out that really helps. And this is pretty much true for all sides boards, that whether it's a big standup foil board or a smaller prone board that balancing out is a really good starting point on where your foil will work best and where you can stand and catch the wave and in the right place, or take off and put your feet in the right place.
centering your weight over the foil
Basically where the volume and the weight of the board and the weight of the whole system. Everything is nicely balanced out. Kay. Next let's talk about your foot placement. So my feet are about equally balanced out between the front and the back of the center of lifts. If you project the center of list of the front flow between your feet, it's going to be more or less between your feet.
And some people have their back foot further forward, but then they also moved their front foot for their back. So if you have a smaller stance or wider stance, if you put your back foot further back, you need to put your front foot further forward. So you always want to find that balance. If your stance is too far forward, you're going to always have sore a sore back leg.
Cause you're always leaning back at higher speeds to just control the foil you're going to or pumping and so on. And it's going to put a lot more strain on your back leg. So if your back leg is always sore, Probably you just want to move that foot further back on the board so that when you're riding and at normal speed, your weight should be just right over the foil and you shouldn't have to put more weight on one side or the other.
It's a small hip movements added to control the height of the foil. So that's really important to have the center of lift of the foil underneath the board bounce between your two feet. And ideally before you put foot straps on your board, You want to figure out without foot straps where your feet are, usually maybe take some video with a GoPro or something like that to figure out where do I put my feet on the board. When you starting out, I don't recommend using foot straps. Our boards have this little arch bar here that's right over the mask so that it gives you a nice, tactile feel for where your back foot is. And then the front foot, usually I oriented with this logo of the blue planet logo a little bit front or back and.
You do want the weight to be either both feet right over the center line, or if you're. The front foot is a little bit off to the side. Your back foot should also be equally off to the side. So whether you're on the center line or slightly off center, you just want to make sure that your body weight is over the center line of the board.
Otherwise you're going to tilt the board and with a wing, sometimes you can get away with both feet being off to one side when you're powered, but then as soon as you let go of the power and you're just on the foil, then the board. Wanting to tip over, like if you, both of you feed off too far off the side, it won't fly well without the power of the wing.
Same thing. If you're talking behind the boat, you can get away with leaning on the side, one side, having your weight on one side, cause you leaning against the rope. But as soon as you let that rope go, you need to have your say your weight centered right over the middle of the board and over the middle of the foil.
Otherwise you're going to tip over. So it's best to start riding your board without foot straps, figuring out the placement where you put the feet, and then once you know where to put your feet, another good way to transition to foot straps is using foot hooks. We have these Eva foot hooks. I'll put the link down to video for that as well.
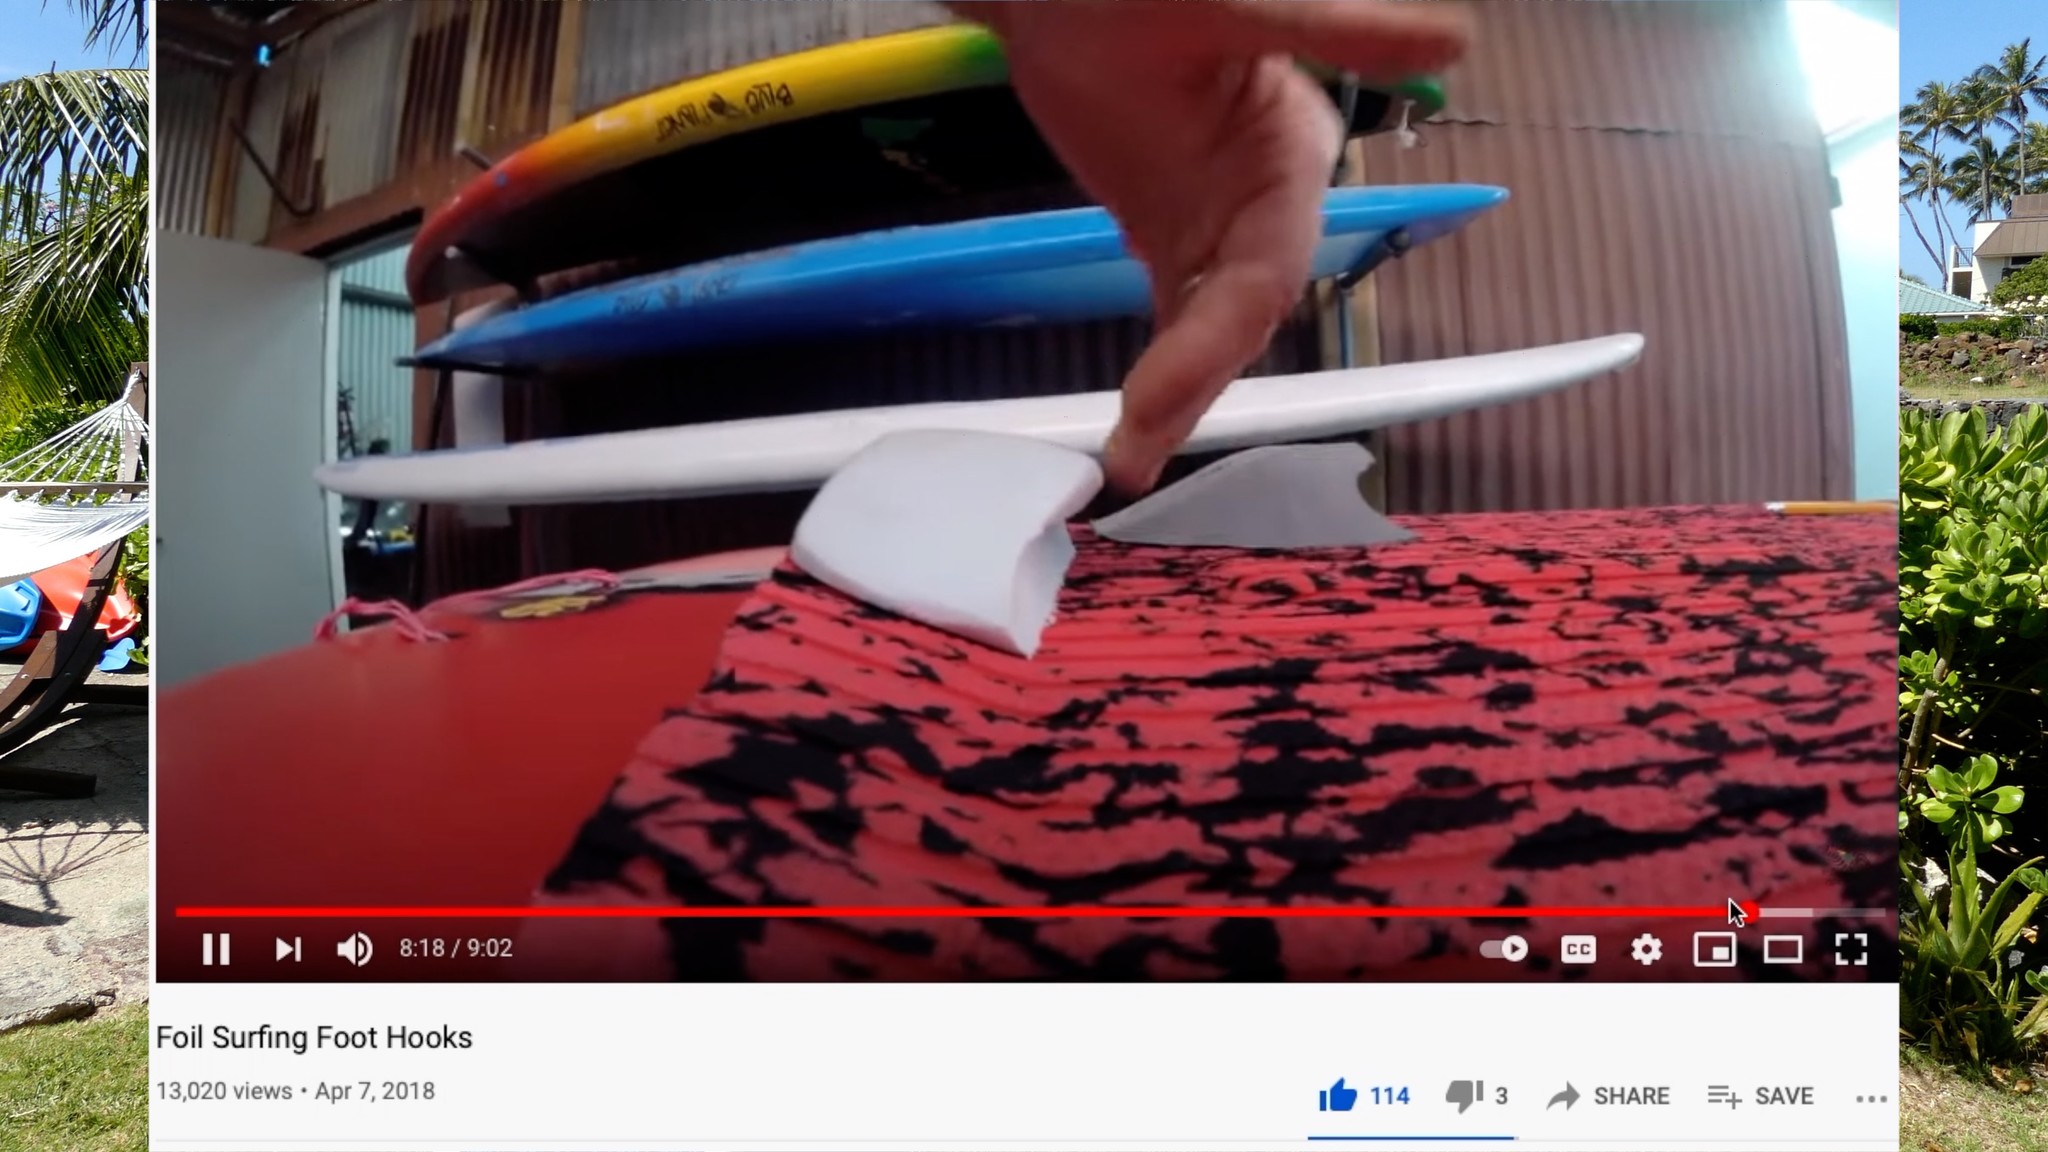
EVA foot hook available at blueplanetsurf.com
Those ones you can attach to the board and kind of wedge your feet against it. And that's helpful without having your feet in the straps or having to slide your feet into straps and so on. So the foot hooks are a good step in between no straps and going straight to straps. And then when you want to start using straps, ideally I would say use the front strap only at first, get comfortable with the front strap.
And then once you're comfortable with that. You can add a back strap. And basically if you want to jump, if you're wing, flailing, and you want to jump, you have to have foot straps on your board. Okay. So to take the foil off, same thing in reverse, I just put it upside down. I loosened the screws. And then I tighten them back down, not too tight, but just so they can slide around in the box.
So put them at the end of the box. Just tighten them in on a little bit, same in the back, take the foil off. Okay. So it's pretty important to keep these little bolts tight in the board so they can't slide out. Okay. So next I'm going to go over how to attach these. Footsteps to the board. This is our blue planet deluxe foot shop.
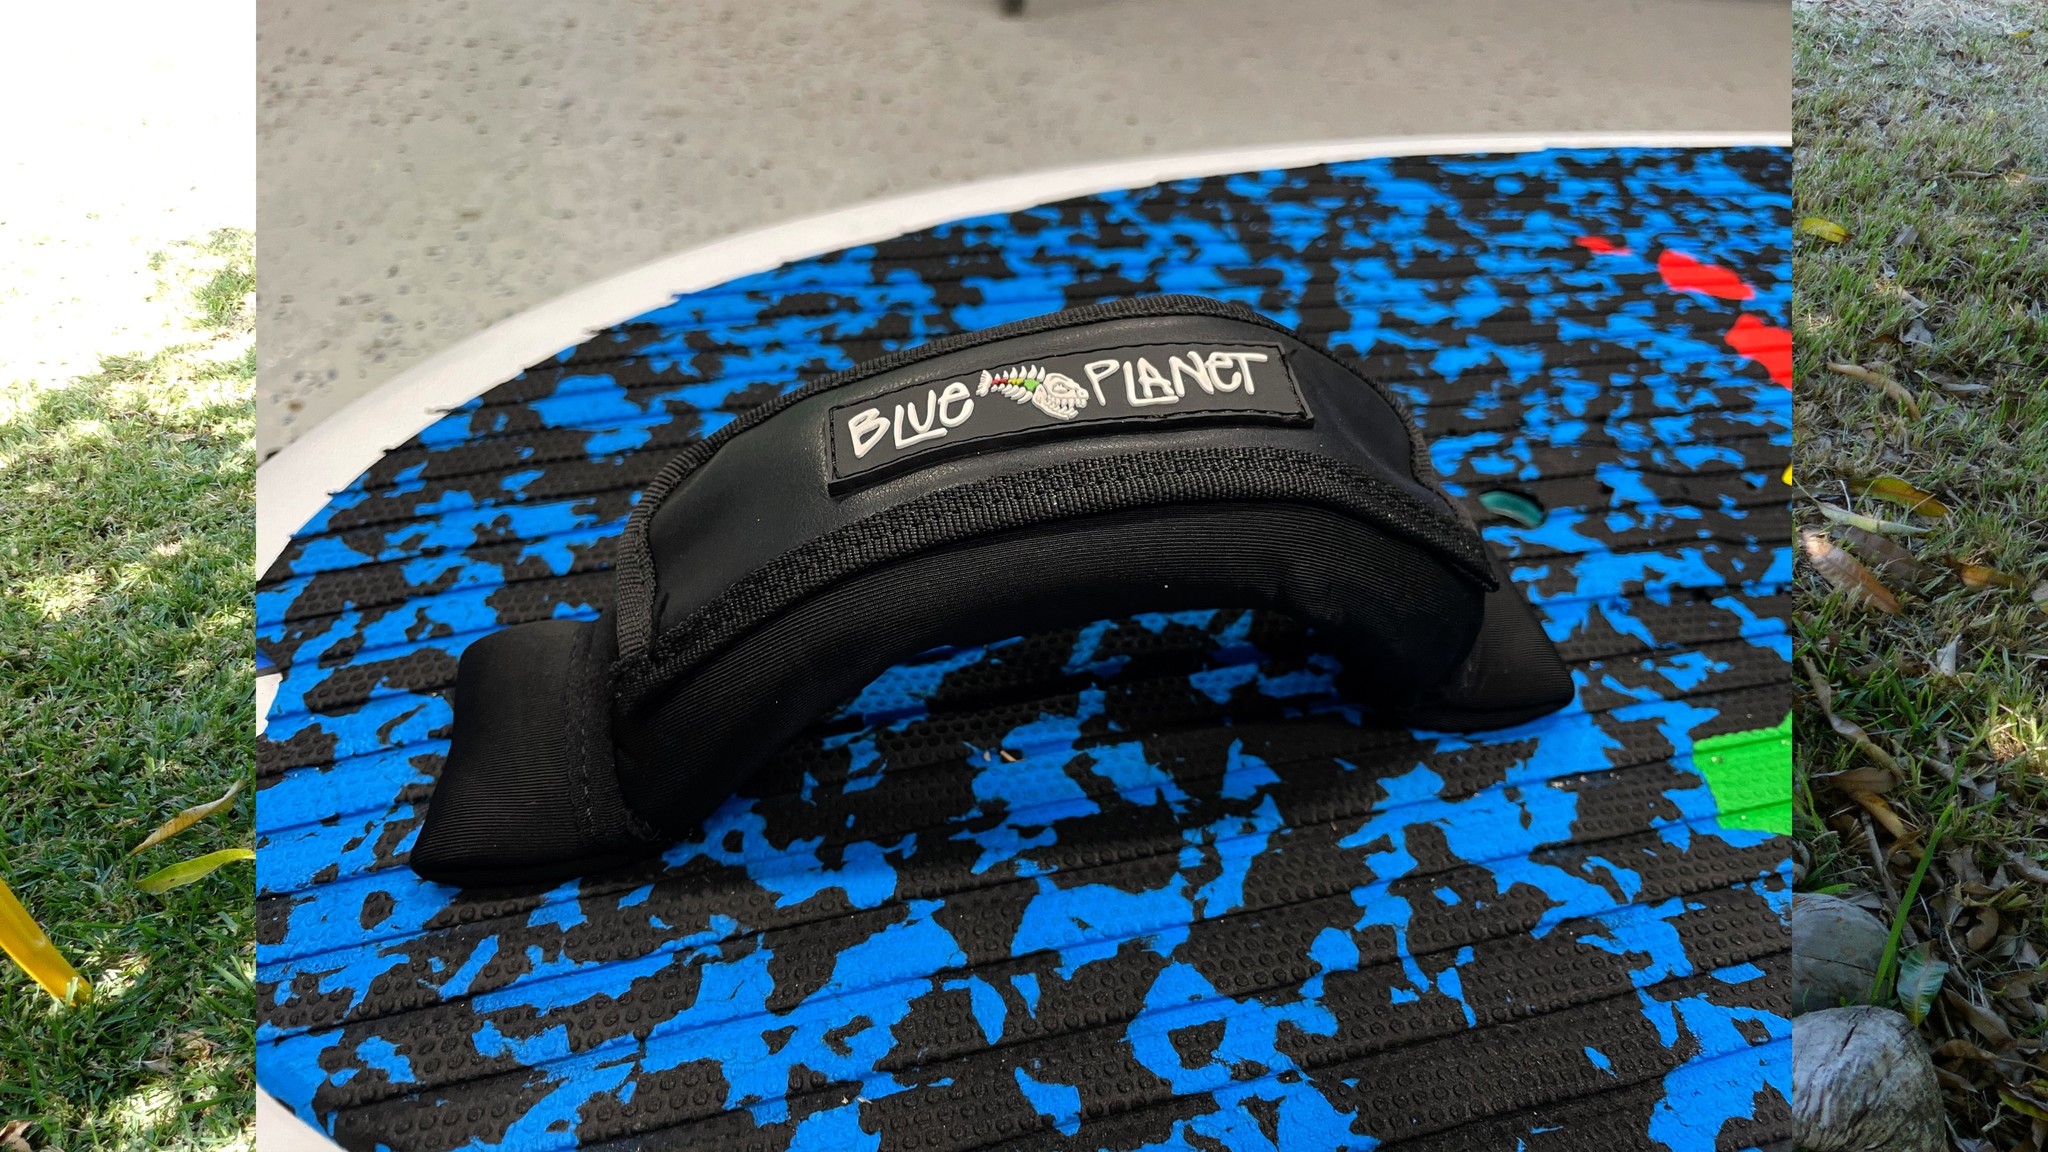
Blue Planet Deluxe footstraps
It's like a neoprene covered foot strap. They're nice and padded. They have Velcro adjustability. So they're nice and stiff. And you want your straps to stand up by them selves. So the feet can slide in easily. Some of them really lightweight, thin straps can collapse. And then it's really hard to get your foot in.
You have to find the strap and wiggle your feet in. So I like to use straps that have more padding they're softer, easier on your feet. Easier to slide in and out of and they stay up better. So that's why I like using these a little bit thicker straps. You had a little bit of weight to your board, but to me, the comfort is way more important than saving a couple of ounces of weight.
So our straps come with these plastic washers and foot strap, insert screws. So these ones go into the type of plastic inserts that most of the boards have. And these ones have a pH three. So lips had number three head. So you have to make sure you use the right size head. Like it's a little bit thicker Phillips head.
And then basically what I do is I just take the whole strap apart and then I put the screw through the washer and then attach that into the middle hole of the strap. So I'm going to put the, just making sure that screw goes. Into that middle hole on the strap, like this on one side and on the other side as well.
Okay. So now I have the screws attached to the two parts of the foot strap. I'm going to turn this inside out. So I have easy access to the holes and then push the screw through the hole. And now I'm going to. Slide this neoprene back over it's neoprene cover back over the screw and the washer really helps keep it from moving around.
Okay. So now I got the neoprene cover, covering the screw, and this is really important. If you're kneeling on your board and you slip off or something like that, if you have a sharp screw heads sticking out on your board anywhere. You just mess up your shin. So having a strap with a covered screw is really important, I think.
Okay. So now I have the screw covered. I already know my location here, but and another thing to mention is for me, I just keep my feet in the same stance. So I got my feet always in the same stance. If you're switching your stance then our whole, our boards have inserts for straps.
You can put one strap like this, and one strap like this for the front feet. If you want to switch and write it both directions. And then on the back foot, you can then put a centered strap in the middle, or you can offset the strap. Like we have inserts that are offset by I think two inches from the center line.
So for me, I use the front strap. A little bit offset to the right. And then so I use the front strap, so it's slightly offset and then the back foot is slightly offset. Off the center line. So this is the center line of the board. So my feet are that way I'm more or less balanced over the center of the board.
So I'm going to figure out the right place to put it. And then, are these screw heads? So the, these screws have a flat surface, so you can't. Go through the bottom of the insert. These inserts only go about an inch deep into the board. So if you use a pointy screw and it's too long, you can actually go through the inside of the insert and into the foam of the board.
And then if you take that screw out a leak water. So you don't want to use a screw that's has a pointy head or is too long for sure. But, okay. So I got this site in. I'm gonna make sure it goes into the right hole, said it right into the hole, and then I'm going to tighten it down.
Now this washer actually is going to compress down against the deck pad. So it actually takes quite a bit of pressure to get it into the right location. Right now I can still move this back and forth. So that's not tight enough. I'm going to make it tighter.
Okay. It's still moving a little bit, but I'm going to test the other side first. So I have the right angle and then I'll, then I'm gonna. Tighten it down fully. So the same thing on the other side, I'm going to flip the strap inside out. So you have access to these holes, put the screw in the center hole on this foot strap, and then slide the neoprene cover back over the top.
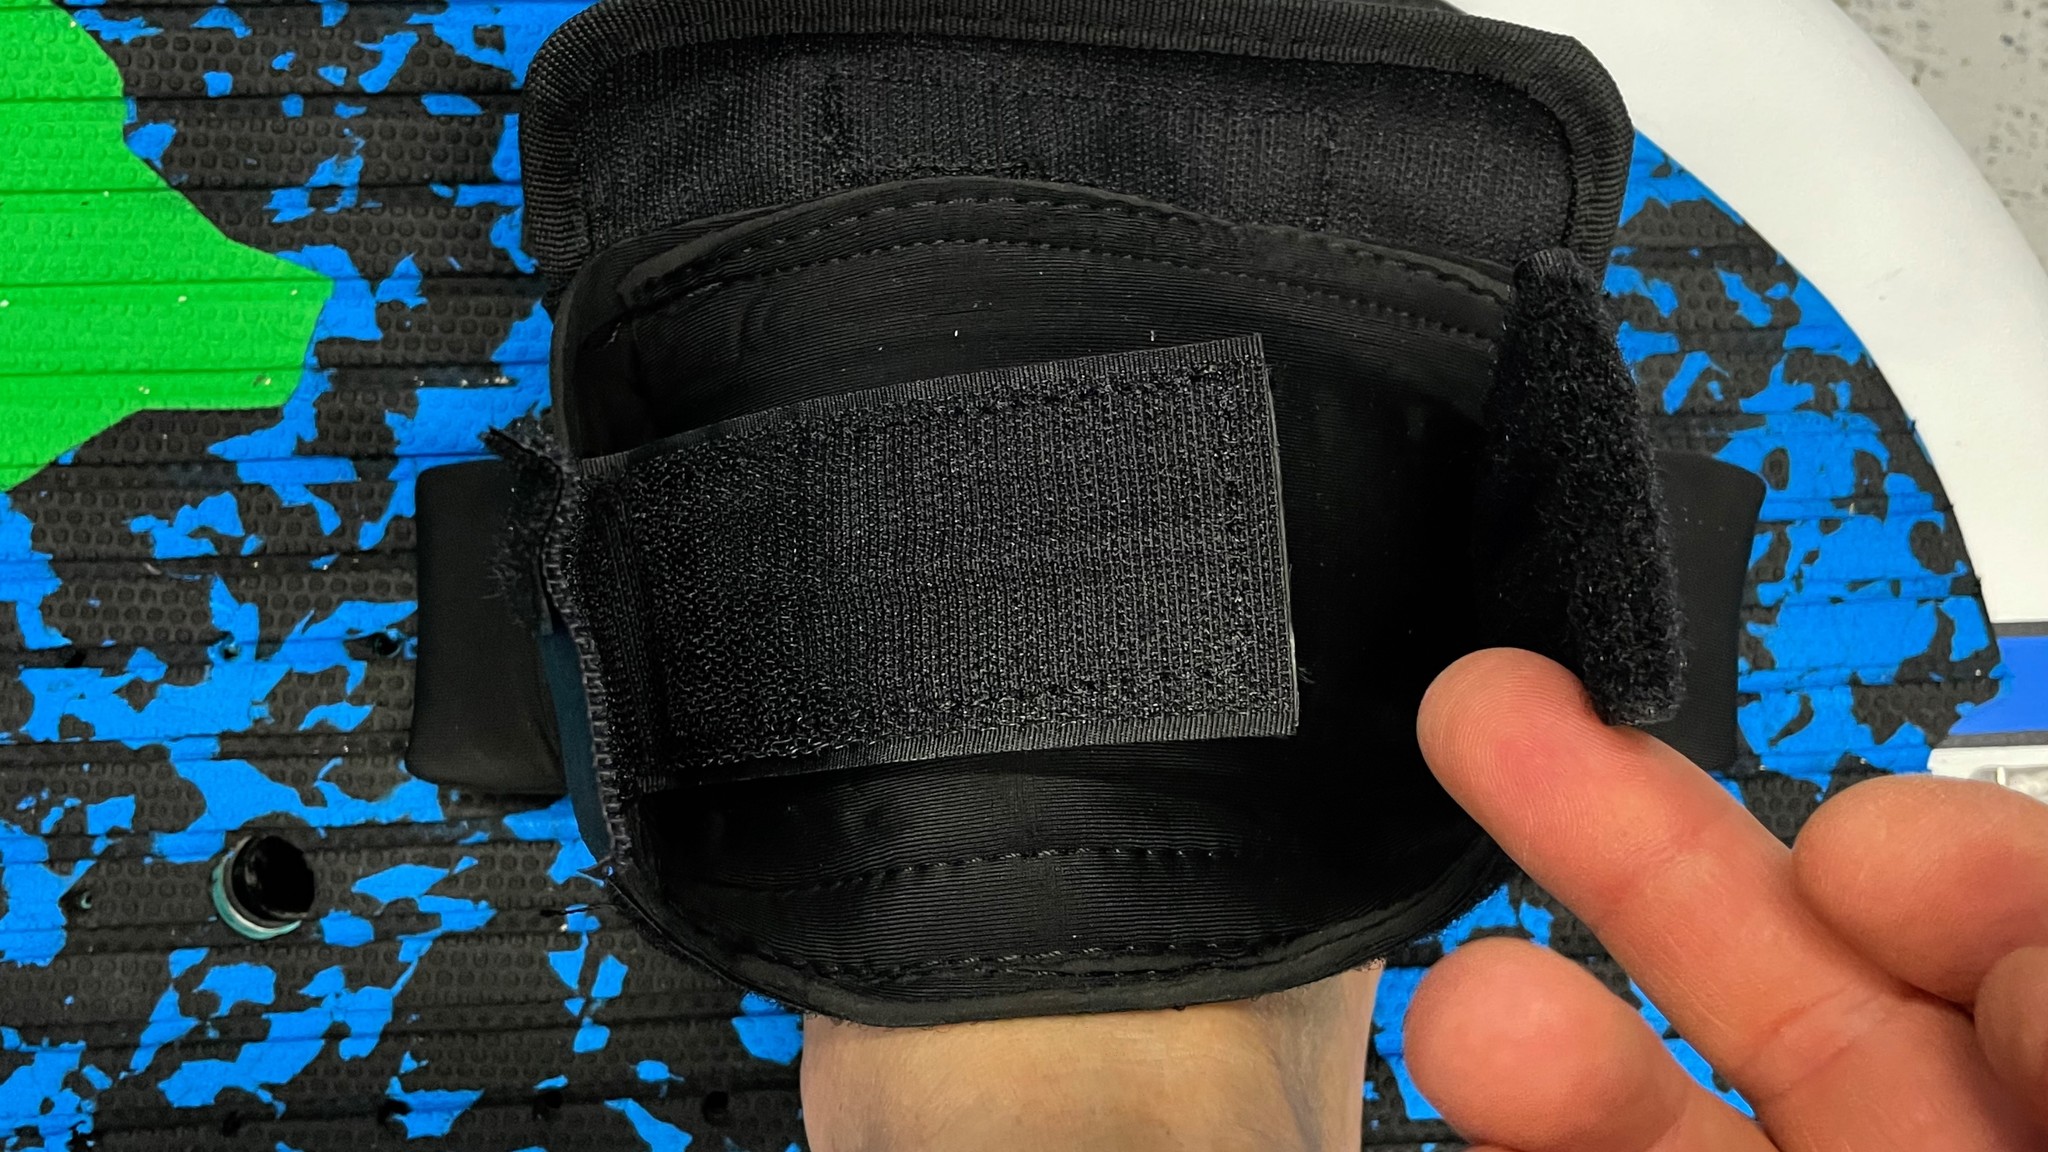
adjusting the foot strap size
And we're gonna keep the Velcro open by the way, too. This cover goes. All the way over the nylon strap on the inside. So the neoprene padding is covering the edges of the strap. So sometimes straps that have just nylon on the ends hard if you hit your toes against it and it can really be painful.
So it's really nice to have straps that have good padding all the way to that over the straps. So basically the whole strap is covered with neoprene. Okay. So now I got the other side and I'm going to set the. Screw it into the hole. Make sure you don't not drilling into the wrong place on your board and you might definitely make sure it goes into the right hole.
Tightened down.
Okay, so now I can still move it around a little bit, but it's pretty good spot and I still have these open. So now I'm going to adjust the strap to the right length and to do that, I actually just put my foot right into the strap and for me, I use kind of this the fat part of my foot right here.
This bone is where the strap is going to go over it. So I'm going to slide it into the strap pretty deep. So to set up the strap, I like to have the strap pretty far up my foot, and it was going to open it all the way. And then I'm gonna tighten the Velcro over my foot at this and this height tighten on the Velcro.
And then I can slide my foot out. You want to make sure that. This Velcro is opposite of this Velcro. So that way, when you close the cover, it attaches to both sides of the Velcro. Okay. So then you tighten it up real good. Okay. Kind of shape it a little bit and test it again. So usually. I get my foot, maybe about this far in the strap.
And this one is still, it's still feels a little bit tight. I'm going to actually loosen it up a little bit more. Sometimes the straps will loosen up a little bit while you're using them. So it's going to slide my foot in a little bit deeper to get it bigger. Tighten it down again.
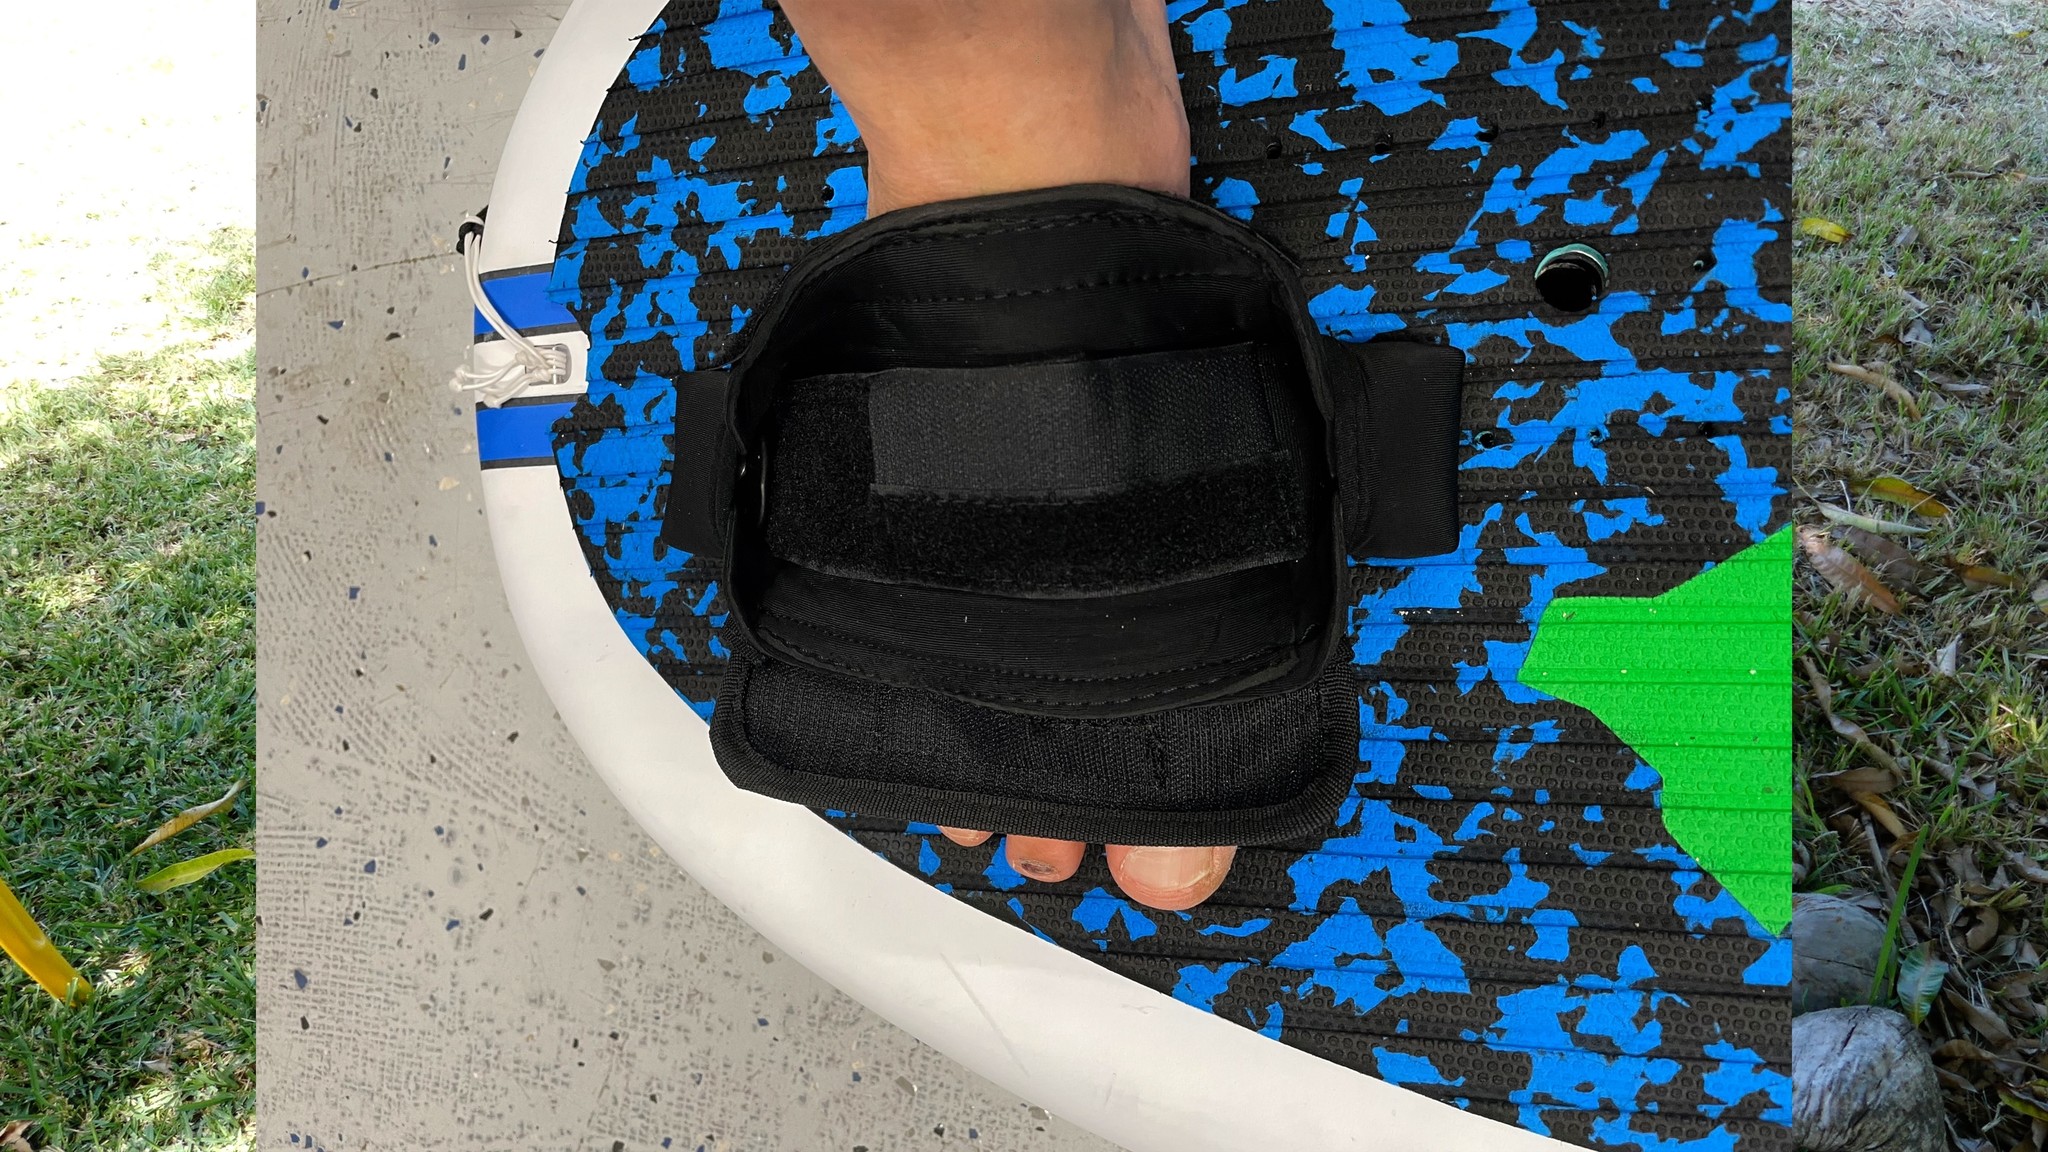
adjusting the footstrap size correctly can prevent injury
And you can actually do this in the water. If you feel your strap is too tight or too loose, it's pretty easy to just open your strap and adjust the height. So test it again. Yeah, this feels good. Get I got good hold, but I can easily slide out. So you want to be able to slide out easily when you fall.
But you want it to be tight enough. So when you're jumping and stuff like that, you don't just slip out. You want your foot to be tight in the strap. So this is a good height for me, hastily. Once I have it in exactly the right place. It's going to straighten out the strap. So it's all lined up and I'm going to tighten it down somewhere.
And the, basically that washer pushes down the deck pad to where. It's it pushes down against the deck of the board itself. So ideally now when I'm trying to wiggle it, okay. This one is still moves around a little bit. So I'm going to make it more tight. I want it to be so tight that
it won't move yet. So now see, even if I move the strap is still a little bit loose.
Okay. That's good. Now I can't, even when I move the strap around this washer is tight. And sometimes over time, the deck pad gives a little bit, so you might have to re tighten these after a few uses, but for now, just get it to the point where. You can't move it easily with just the foot strap, moving around.
Cause one of my pet peeves is when I use other people's boards and their straps are all loose and they get all twisted and it just makes it harder to get your foot in the more your foot straps have a nice structure and the easier it is to get your feet in and out of the straps. And that helps a lot.
 \
\
fully padded strap without any sharp edges
It makes it safer and easier and more comfortable to ride it. And so on. Another tip is when you when you store your board, don't lay it like this flat on the straps put cause then all the weight of the board sits on the straps and can flatten out the straps. You don't want these straps to be like flattened down and take this shape because then it just makes it harder to put your foot on.
You want to keep the straps in a nice open position. So like when I put it in my car, I usually keep it upside down, but I have something underneath it that puts the weight more here in the nose and the tail and keep the weight off the straps. So when I put it in the car, I make sure there's something underneath it that keeps the weight off the straps. So they don't get flattened out.
Don't let the foot straps flatten out
I've also seen people who just stick like a pool noodle or something in their straps just to keep, so they keep their shape better having that. Nice. Open foot strap shape really helps another thing for the front strap. I like to place it so that, if water comes over the front of the board, if, if you notice sinks and you do a hard landing or something like that, the water shoots over the board.
I like to have it. So that Velcro opens. Away from the water flow. If you had to turn the other way, the water flow could actually push this Velcro open, so by turning it this way where the Velcro is with the direction of the water flow is less likely to get pushed open by the water.
That's just another little pointer. So having good foot straps is super important. I think just make sure that the neoprene is nice and soft, slippery. You don't want straps that kind of trap your feet are, they're hard to slide in and out of you don't want straps. I said don't have good padding.
You don't want straps that have exposed screws that can scratch you up. So having good foot straps is super important, especially if you do stuff like big jumps or aerial moves or tricks. Also when you're pumping or it just gives you way more control when you're surfing the wave and so on. But if you're just starting out, I always start without foot straps slowly work your way up to using foot straps.
Start with the front strap only later on, add your back strap. And make sure you're comfortable using them. And once they're set up perfectly it's awesome. And usually you can just leave the footsteps in the same position. If you have a box, then you just change your location of your foil as needed to keep the center of lift over the center of your feet.
Okay. So that's it. I hope you found this video helpful to get your gear all set up properly and nicely balanced and so on. Thanks so much to all the blue planet customers for your support. Definitely. If you're looking for new gear, check out our website, blue planet surf.com or come to our shop in Honolulu and we'll get you set up.
We have a really nice deal. If you're buying a board and a full together, you get a hundred dollars off. If you're buying a board, a foil and a wing together. Yeah, $150 off. So just call us. We'll be happy to help you. If you enjoyed it, please give it a thumbs up on YouTube. Subscribe to our channel and we'll see you on the water.
Aloha!
For more information on foils and foil board setup, please also watch this video:
Hi Hugo,
Yes, small adjustments can make a big difference, you can also play around with different foot placements.
Thanks Robert and Kane for the helpful methodology to set up a foil. I got close on the first try using center of lift/CG and equal stance . Had to go a little more forward on one board, maybe due to th additional lift of the rear stabilizer.